Capacity
Before you can deliver your applications and desktops to your users, you first have to set up one or more pools of production instances – this defines the “capacity” of your account. Each production pool corresponds to a specific instance type (e.g., # of vCPUs/core, memory, and GPU). You can set up your production pool capacity to power on/off dynamically based on user demand. Elastic Instance Management or “elasticity” is a rule-engine in the Frame platform that allows an administrator to configure immediate access to instances by defining how many instances should be powered on at specific times. Admins can schedule capacity for each pool by clicking “Capacity” listed on the left side of the Dashboard and clicking on the tab for the pool.
You can define one or more production pools with the same instance type.
Additionally, you can set up and manage one or more pools of test instances so that you can publish image changes to a smaller group of users before publishing the image changes to your users accessing the production instances.
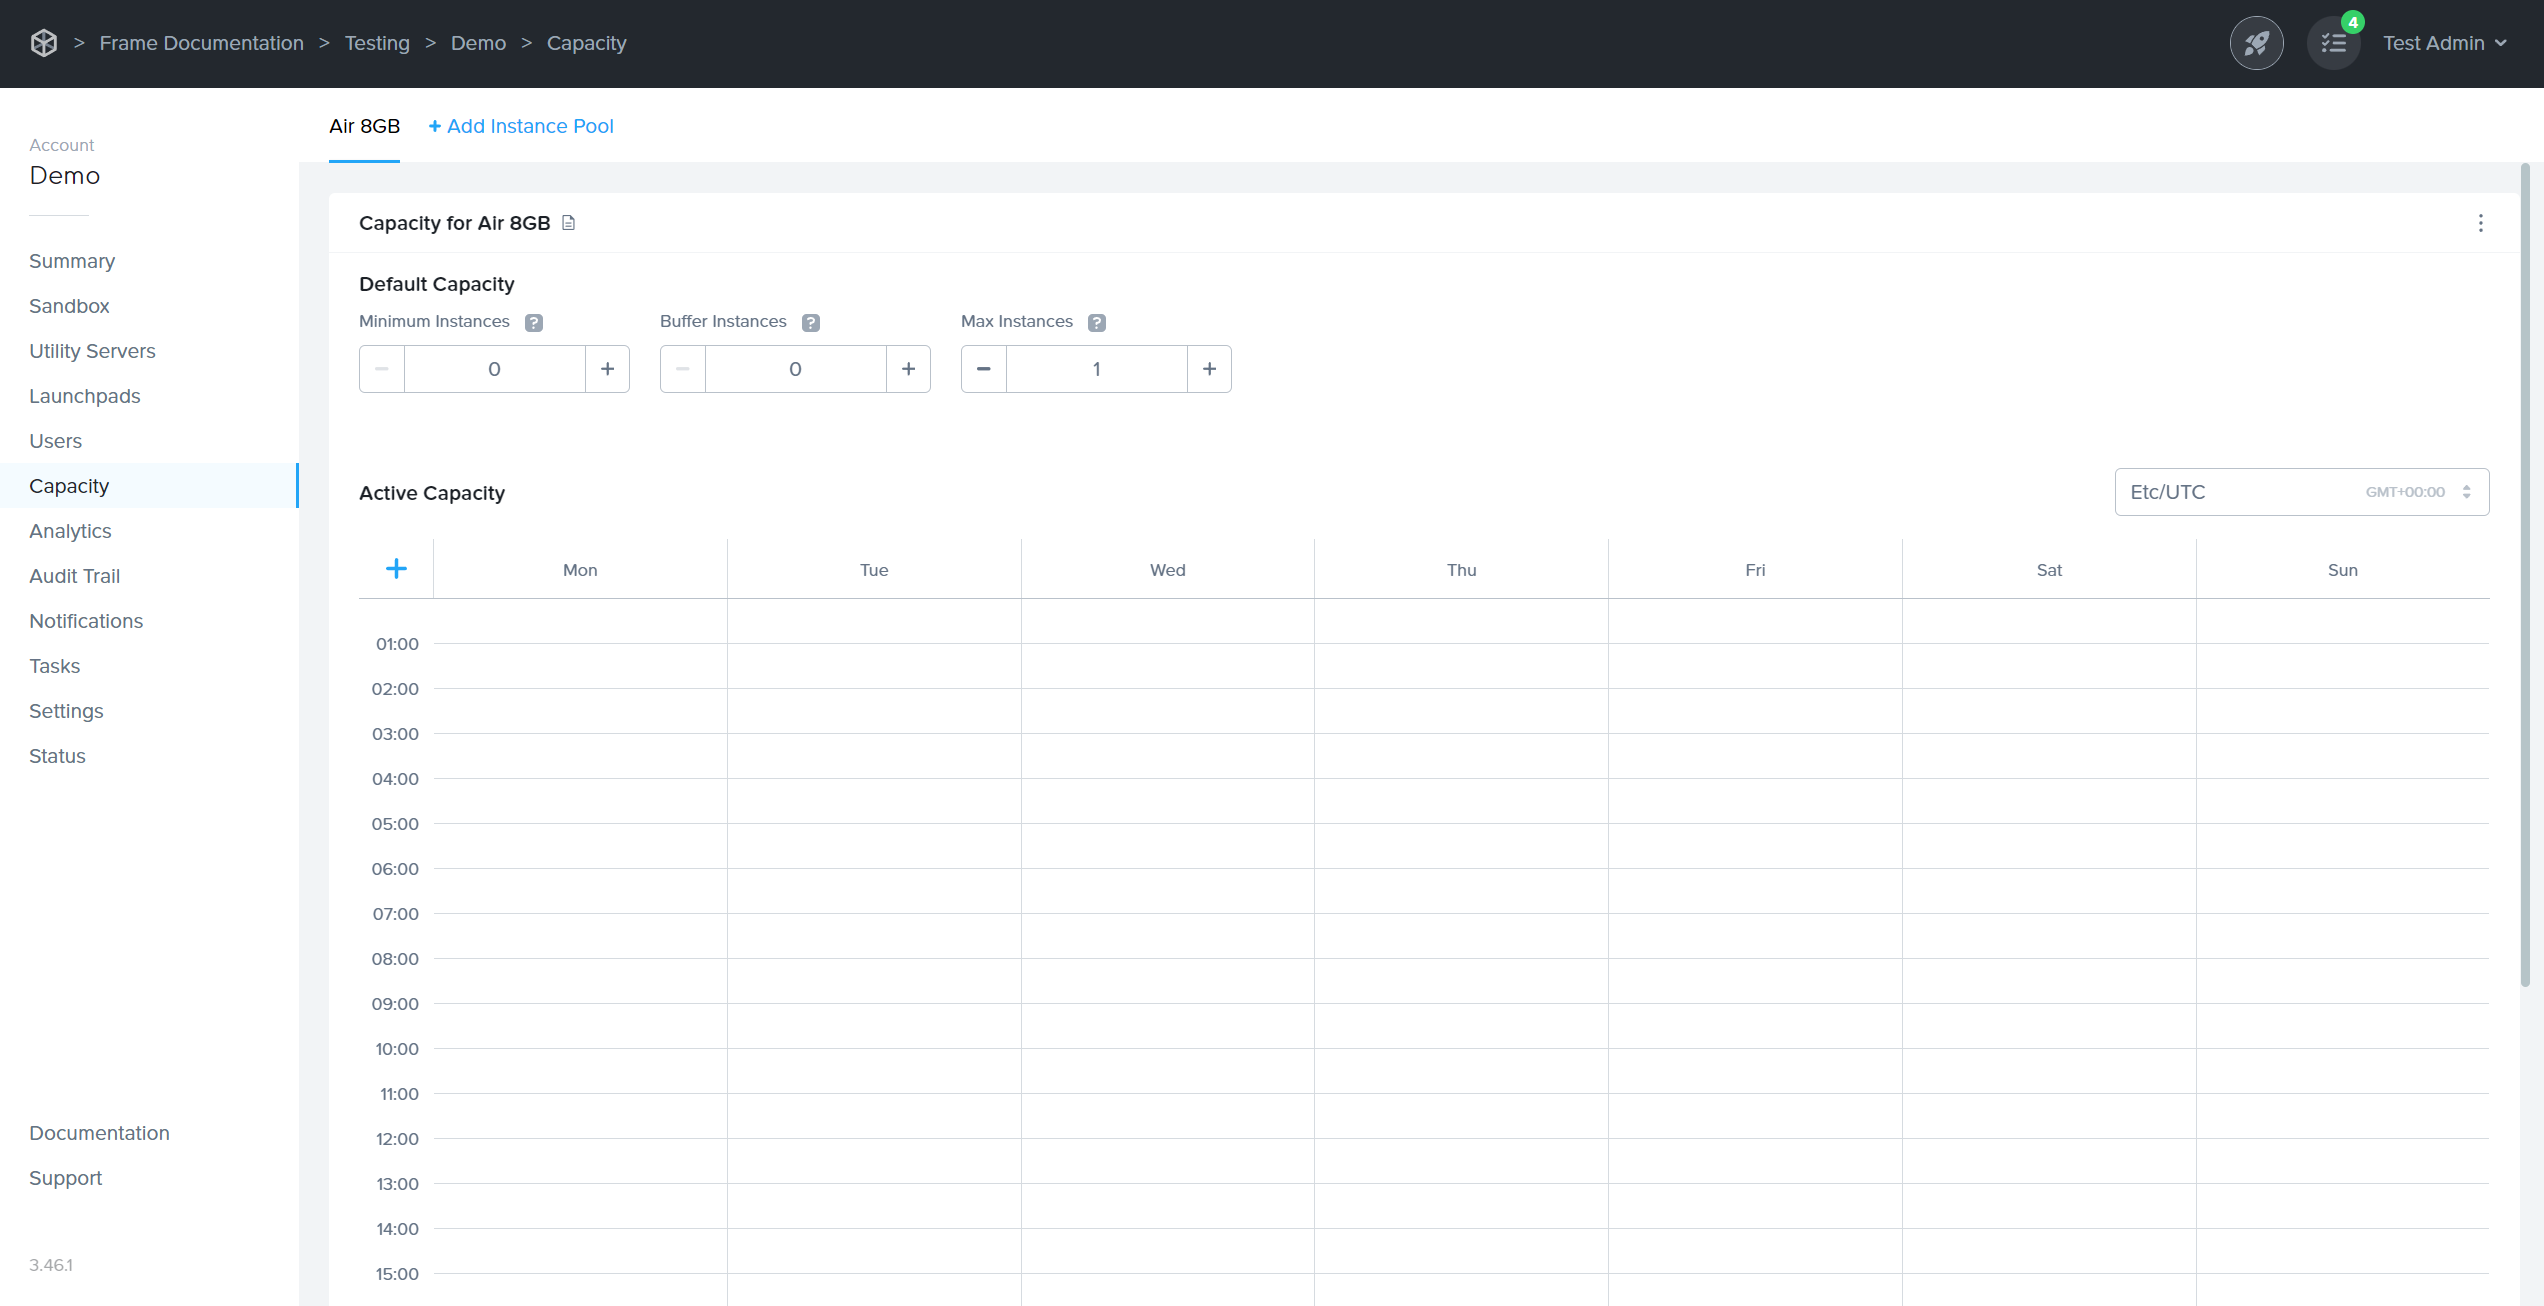
Default Capacity
Three key parameters define the default capacity of each production pool:
Minimum number of instances (Min): The minimum number of instances powered on at a given time that can be accessed by users immediately.
Buffer instances (Buffer): Additional powered-on instances that are ready for a user within seconds. Set this to a number of users you expect will connect within a 2-minute window of time (the time it takes to boot an instance).
Max number of instances (Max): The desired number of instances (concurrent users) to be provisioned for the pool. The administrator should determine this number based on peak session concurrency since this is a hard limit.
As an example, let's say that you have an “Air 8GB” production pool with a minimum of 5, a buffer of 3, and a max of 20 under “Default capacity.” The system will work as follows:
With no user load, 5 Air 8GB instances will be running ready to accept a connection (the minimum).
Once three users connect, there will only be two powered on instances left from the original set of “minimum” instances. Since the buffer is set to 3, the system will automatically power on an additional instance, so that there are at least 3 “buffer” instances – three in use and three ready for new users.
Each time a new user connects to consume one of the buffer instances, another instance will automatically be turned on to replenish the buffer.
As more users connect, more instances will get provisioned – but the system will always attempt to maintain a buffer of 3 instances to ensure that new users get connected as quickly as possible to a session.
The platform will continue to scale up until it reaches the maximum value, which is 20 in this case. The 21st user (and all subsequent users) will get an “out-of-capacity” message when attempting to connect.
As users disconnect and instances become free, the system will also power down instances automatically. Note that instances will remain on in full one-hour increments and automatically turn off if not in use, based on your capacity settings.
Eventually, as user demand decreases back to zero, the powered on instance count will go back down to the minimum of 5.
You can have a minimum of 0 and a buffer of 0 to ensure that instances are powered on only when a user requests an application or desktop. In this case, users will have to wait a few minutes (typically 2-3 minutes) for the instance to become available after the users request their apps or desktops. They'll be notified that an instance is powering on.
It is best to set the min and buffer to 0 and the max to 1 when publishing for the first time since you are still testing everything out.
Note that min and buffer instances incur hourly usage whether users are connected or not. You can set both to 0, so instances will only boot on-demand. This conserves usage, but users must wait approximately 2 minutes to start a Frame session.
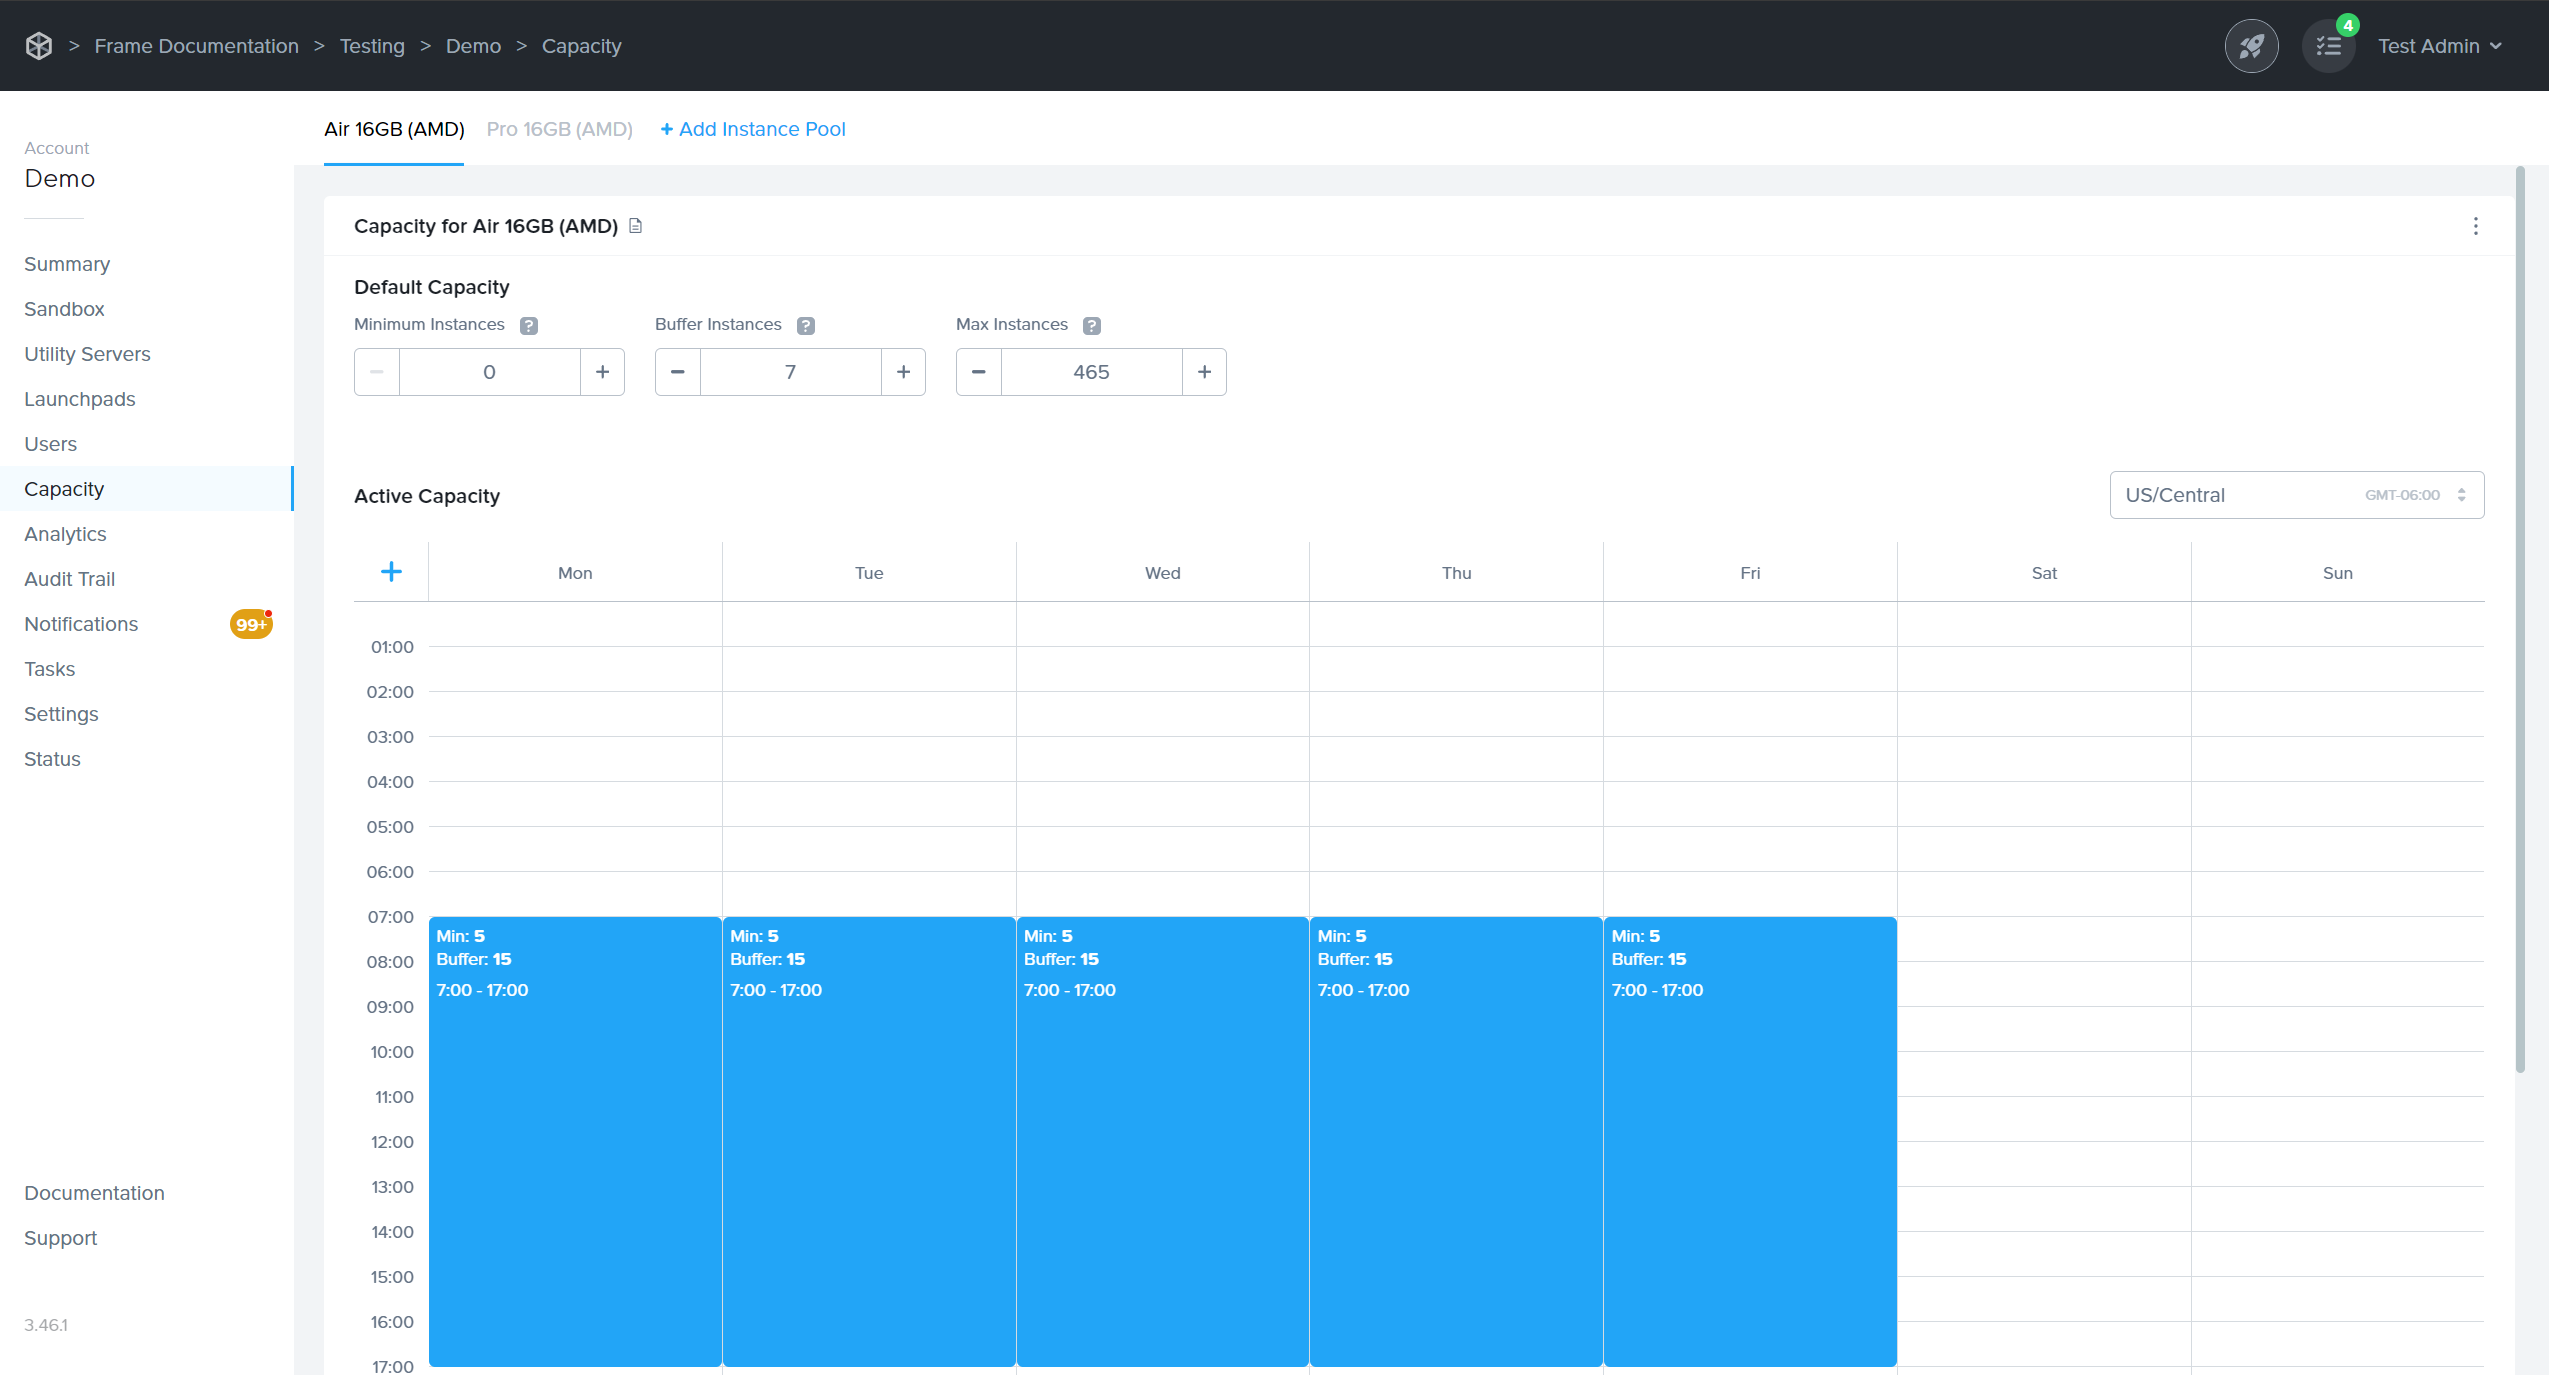
Active Capacity
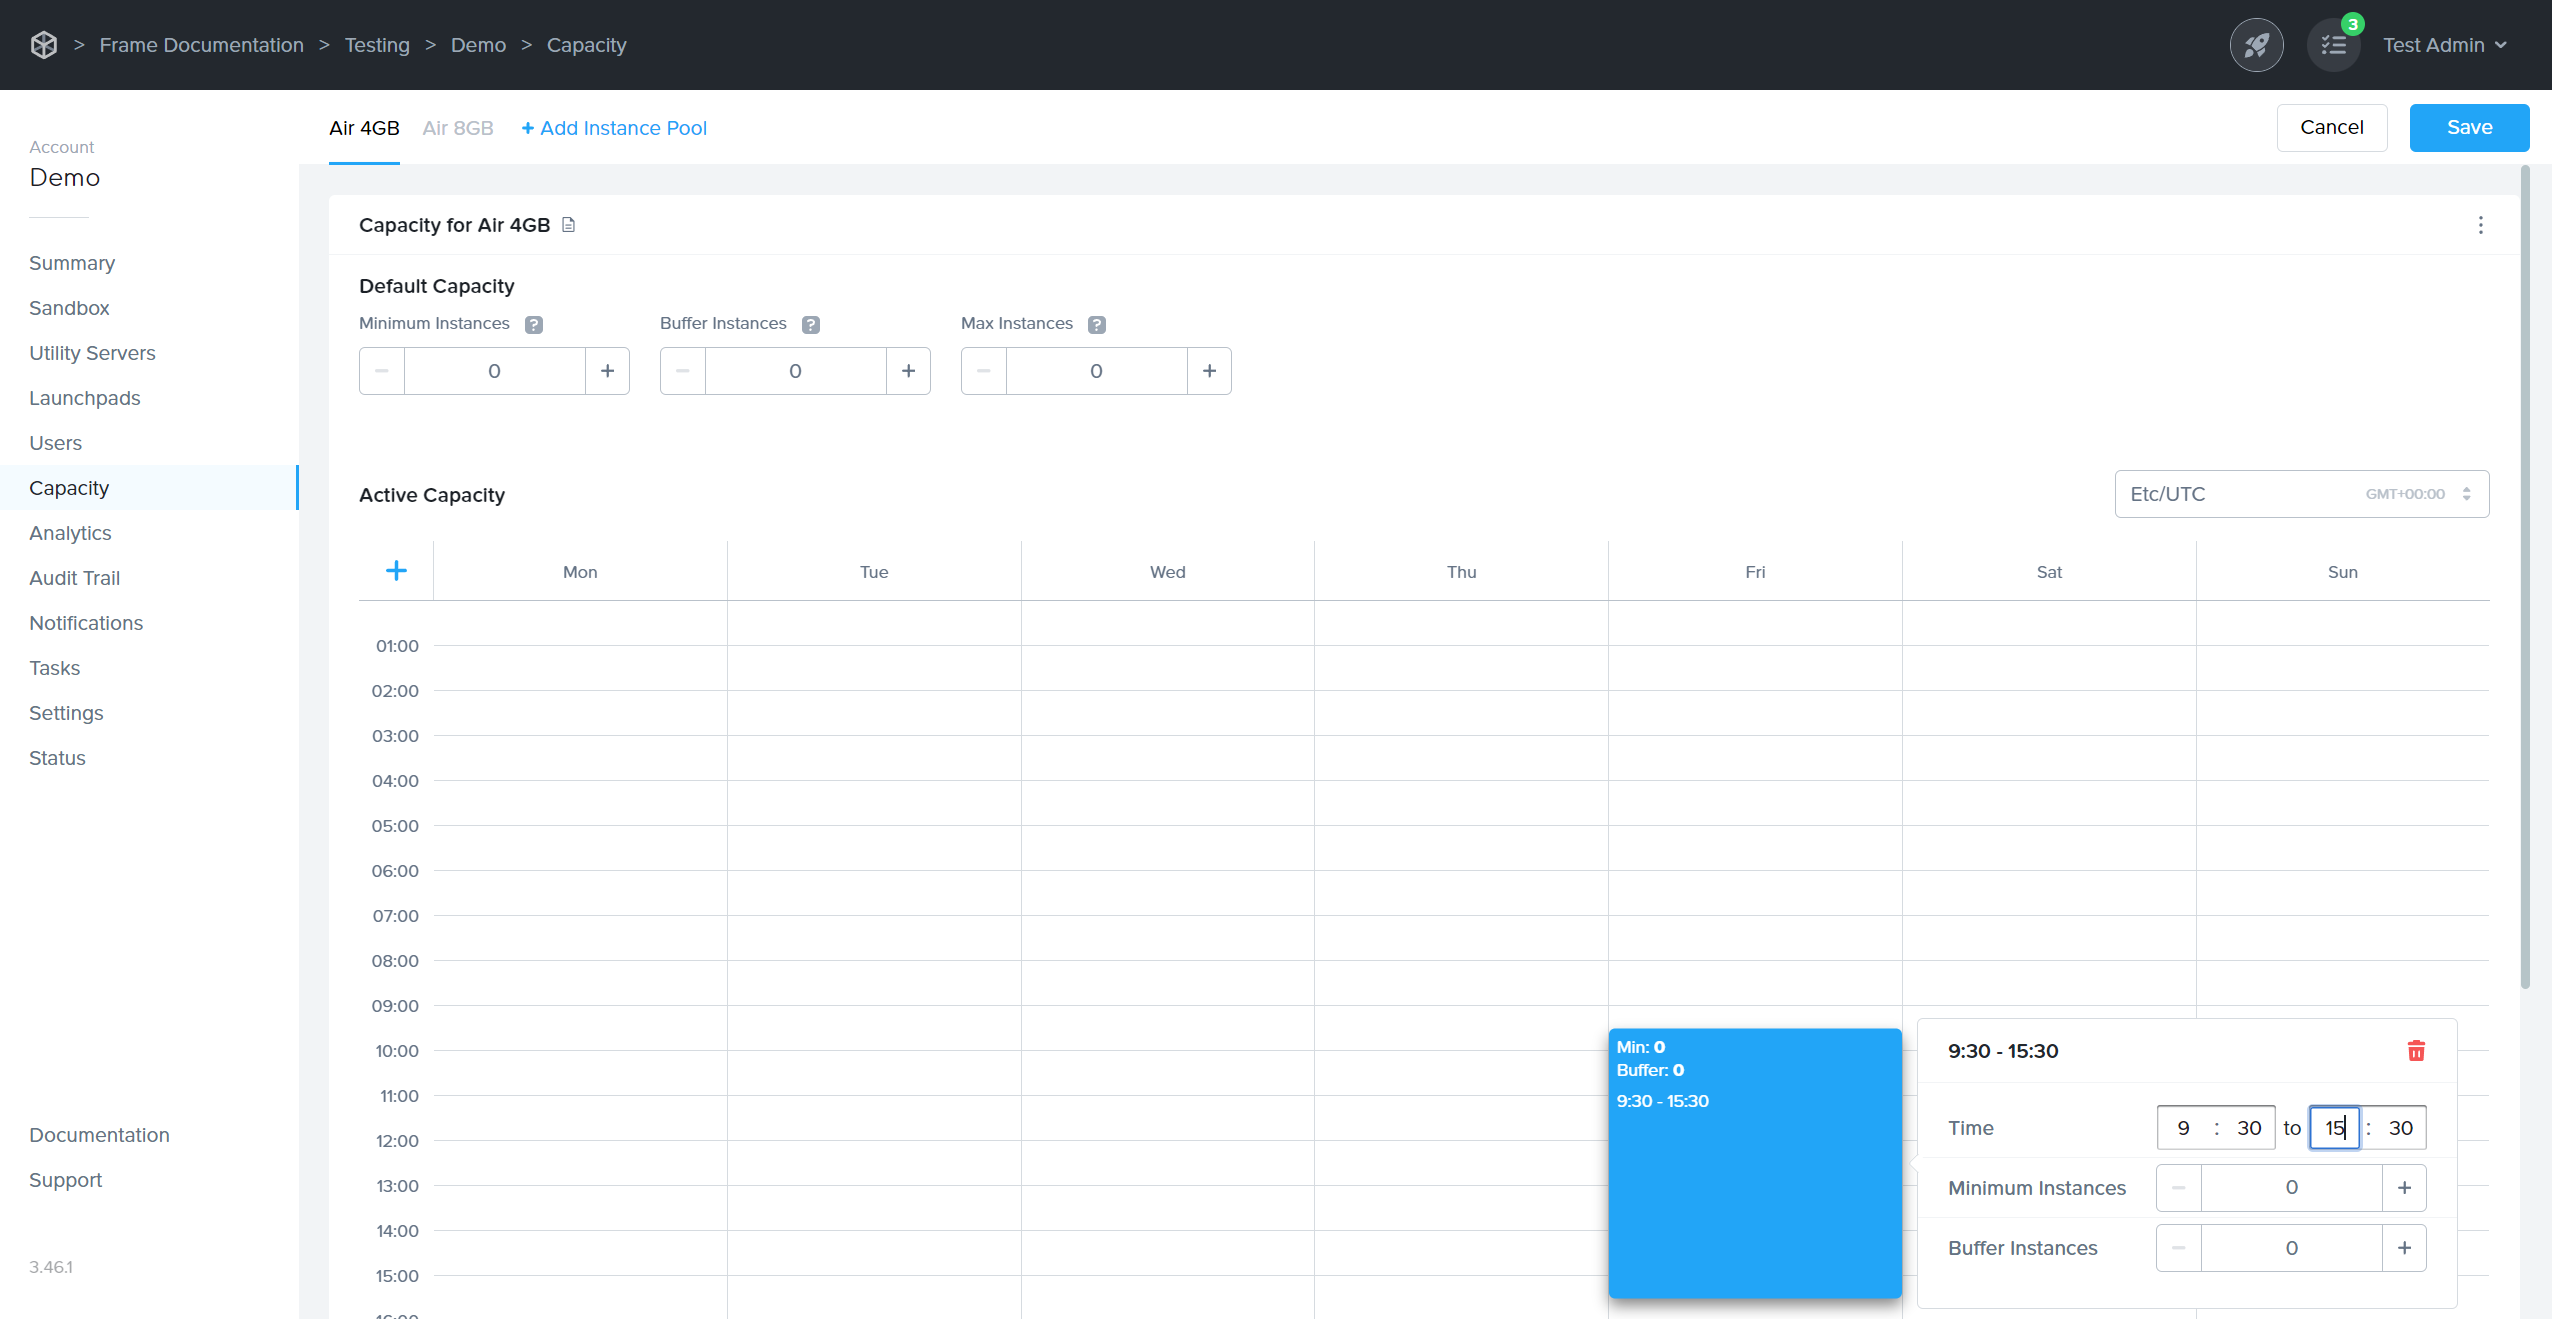
The Frame platform allows admins to define “active capacity” for certain times of day for certain days of the week. For example, you may want your minimum and buffer increased during specific hours on specific days when you expect an increase in usage. To schedule active capacity, simply click anywhere on the Active Capacity scheduling table to create a start time and then drag to the end time. This can be adjusted at any time by clicking from the desired start/end edge and dragging.
With Active Capacity, you can define the following parameters for each time window:
Minimum number of instances (Min): The minimum number of instances powered on at a given time that can be accessed by users immediately.
Buffer instances (Buffer): Additional powered-on instances that are ready for a user within seconds. Set this to a number of users you expect will connect within a 2-minute window of time (the time it takes to boot an instance).
You can click and drag the scheduled entry and move it anywhere on the calendar to change the time. Click on the entry itself to make adjustments to the min/buffer settings or manually edit the time schedule.
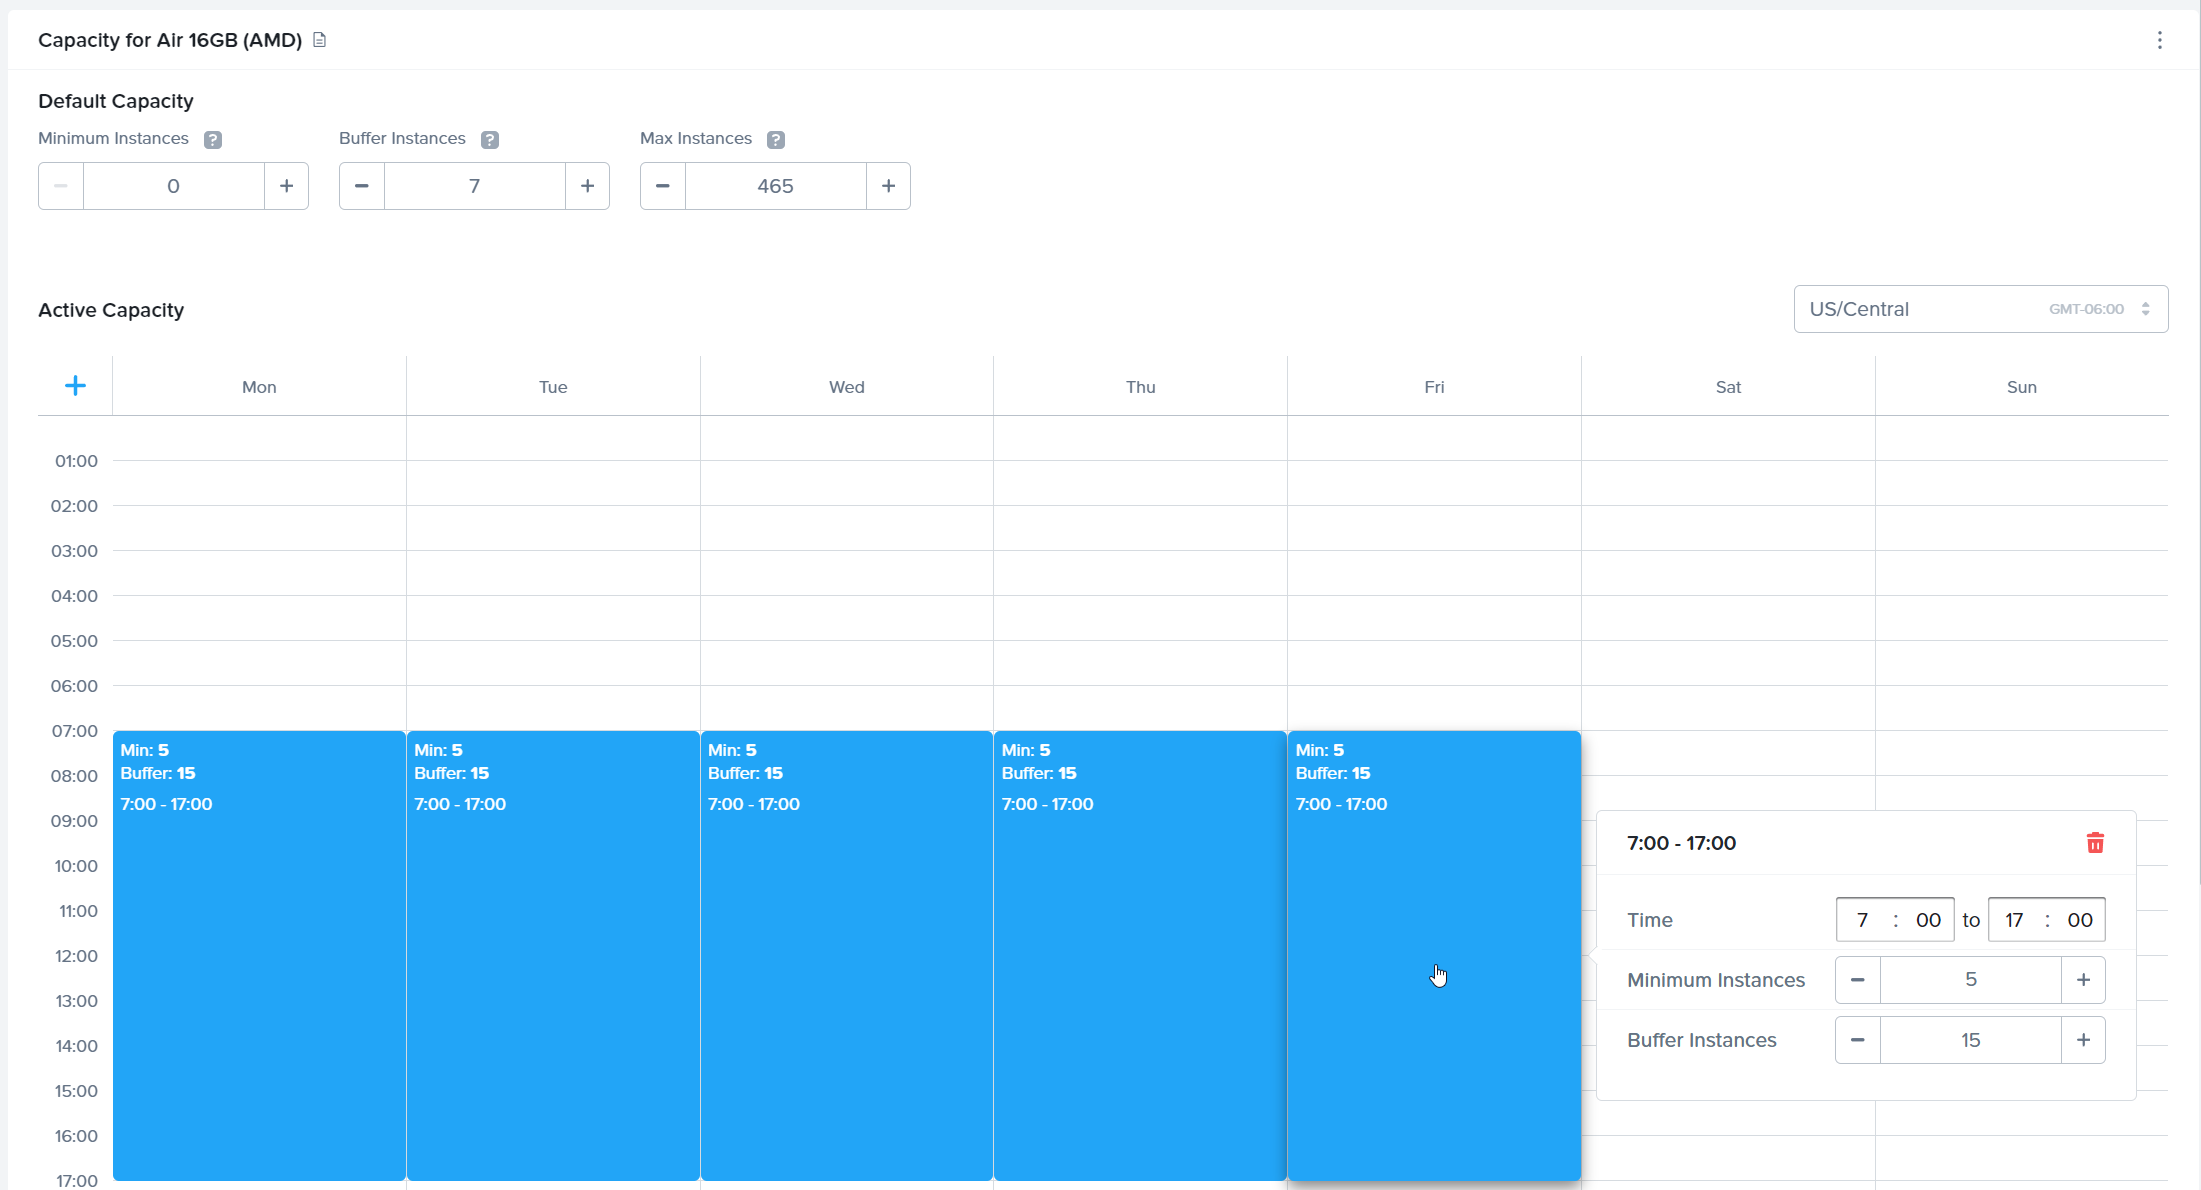
The example above shows our active capacity schedule: Monday through Friday between 7 AM and 5 PM, the minimum will be set to 5 with a buffer of 15. If the fields under Active Capacity are left blank, the system will use the Default Capacity specified on the left side of the page.
Be sure to save your changes by clicking the blue Save button in the upper right corner of the window.
Capacity per Pool
Admins can define production pool capacity depending on the instance type being used. For example, you may have a team of power users requiring an instance type with more RAM or vCPUs. You can then set active capacity for that instance type by clicking on the corresponding instance type tab and defining those values.
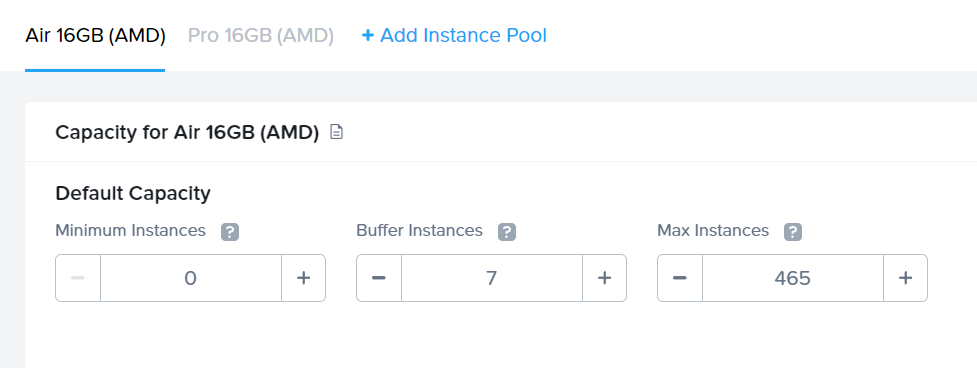
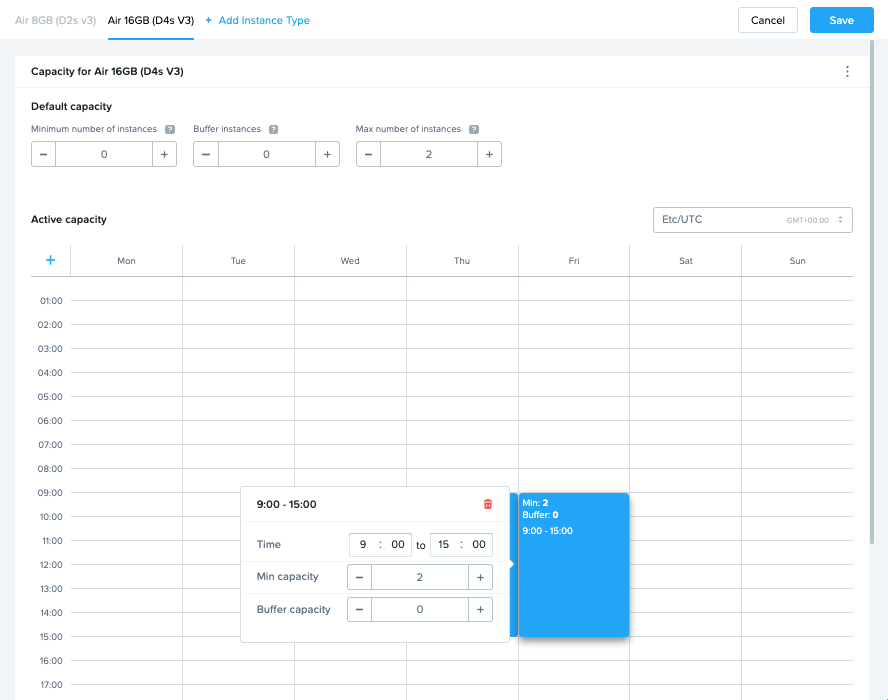
In the example below, we have enabled a minimum of two Air 16GB instances to be running and available between the hours of 9 AM and 3 PM UTC every Thursday and Friday of the week. The active capacity has only been set for the Air 16GB instance type. Administrators may specify default and active capacity settings for any of their instance types by clicking on the corresponding tab, adjusting settings, and clicking Save.
Add Test Pool
Admins can add test pools for a given cloud infrastructure, once they have enabled Test Publish.
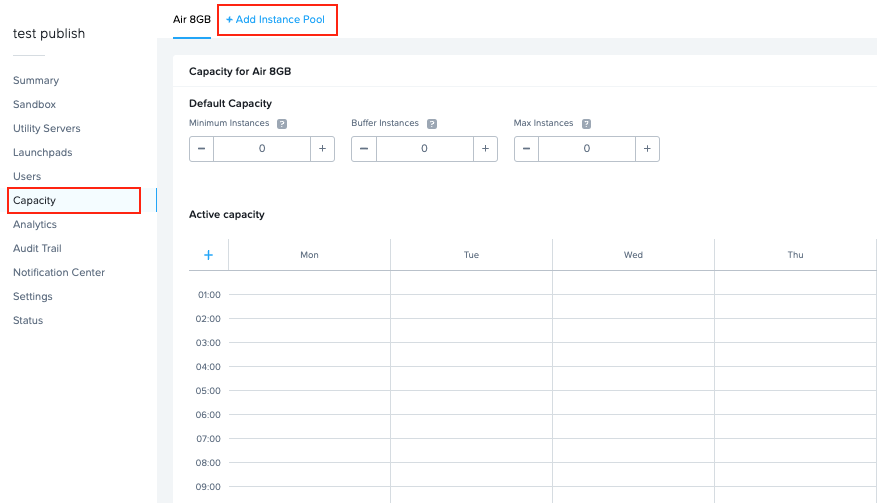
To add a new test pool, go to Capacity from the Dashboard and click on the + Add Instance Pool option to the right of the existing production pools.
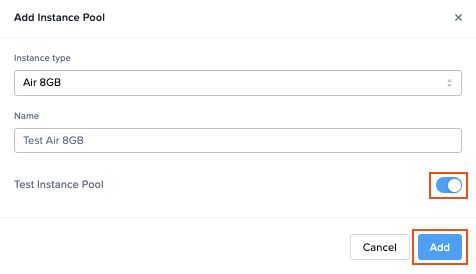
At the prompt, create a Test Instance pool by selecting the desired Instance Type, providing a name, and enabling Test Instance Pool. Click the Add button to confirm your choices and create the test pool.
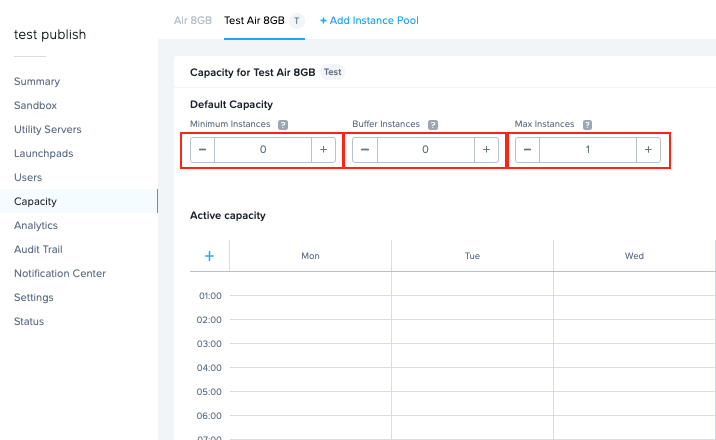
You will see a T icon in the newly-created tab, along with the word Test to the right of the Capacity and instance pool name, denoting that this instance pool is a test pool. Configure the capacity of the new Test Pool by specifying Minimum, Maximum, and Buffer values.
Any test instances provisioned count towards the maximum number of workload VMs provisioned for your Frame Customer entity and in determining Max Concurrent User subscription overage.
Add Production Pool
Admins can add additional production pools for a given cloud infrastructure. To add a new production pool, go to Capacity from the Dashboard and click on the + Add Instance Pool option to the right of the existing production pools. A new window will appear, select your new instance type from the drop-down menu and click Add.
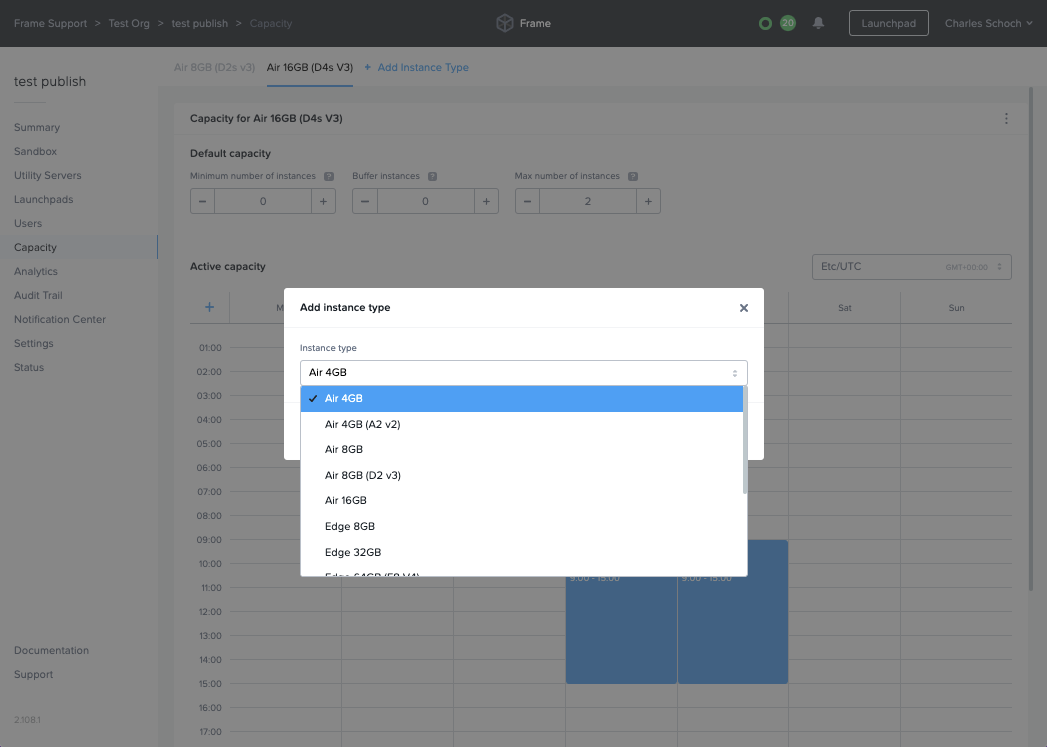
The selected instance type will now be added to your set of production pools. You can check your Tasks widget for the status of your pool creation request.
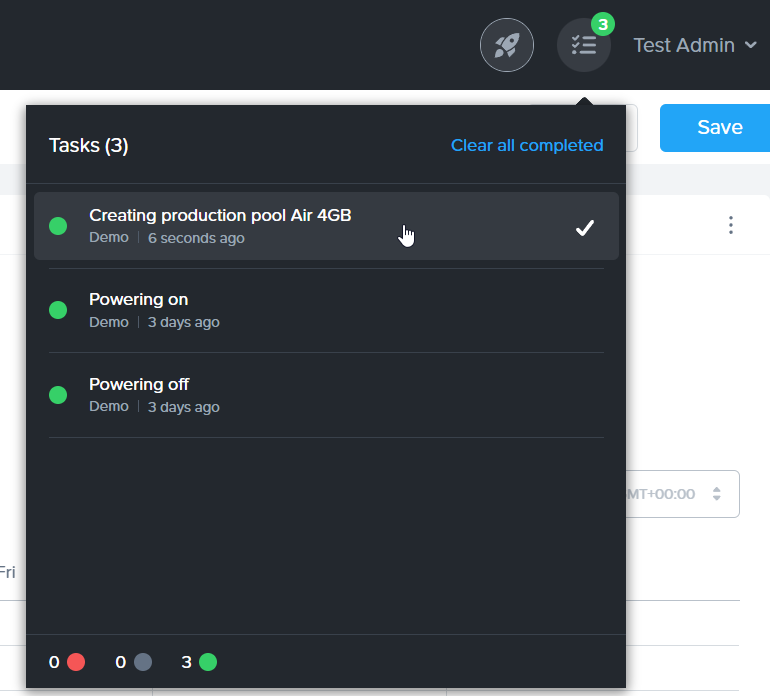
Once the production pool for your new instance type has been created, it will appear as a selectable tab at the top of the Capacity page where you can modify capacity settings.
Modify/Delete Pools
A production pool with a Default Capacity max of 0 can be deleted from the production pool list. To delete a production pool, go to Capacity from the Dashboard and select on the production pool you wish to delete. Click on kebab icon and select the Delete option. From the same menu, you may also Rename your Production/Test pool.
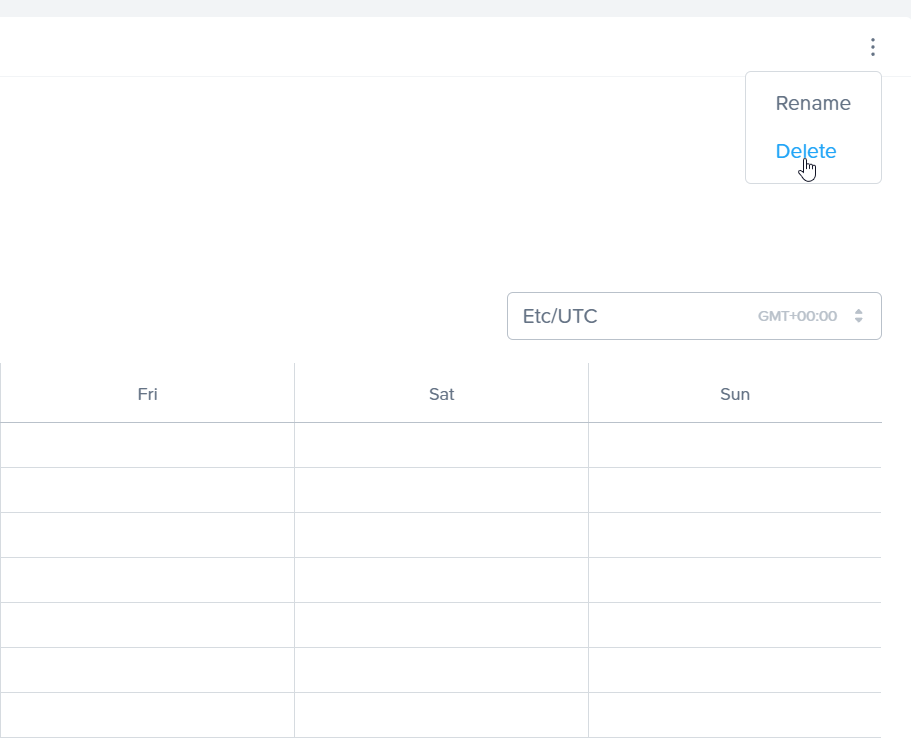
Frame will request that you confirm the deletion of the instance type pool - “Delete” to delete the pool and “Cancel” to not delete the pool.

Both Production and Test pools must have their max set to 0 before being deleted.