Duo
Integrating Duo Single Single-On (SSO) is a quick and easy process. Continue reading to learn how to configure your Duo Single Sign-On users with Frame.
Prerequisites
- Administrator access to a Duo Account
- Duo Single Sign-On must be enabled in the Duo Admin Panel
- A configured authentication source such as Active Directory or a SAML IdP (Okta, OneLogin, Google, etc.)
Getting started
To begin, let's create a URL-friendly SAML2 Integration Name that we'll use in a few places throughout our setup. Continue below for help and examples that you can use in your SAML integration.
Integration Name examples for Duo Single Sign-On
Your SAML2 Integration Name is a case-sensitive, URL-friendly, unique, and descriptive value that represents the integration between your Duo Single Sign-On and Frame. This value can have only letters, numbers, and the dash symbol; no spaces or punctuation are allowed.
We recommend using something that includes descriptive information, such as your company and identity provider's names. This integration name is tied to your SAML2 endpoints on Frame and using descriptive names can be useful for debugging.
Optionally, fill out the information below to get a recommendation of what you could use.
Using the values copied from above and following the steps below, we'll create and gather these details to configure proper communication between Duo and Frame.
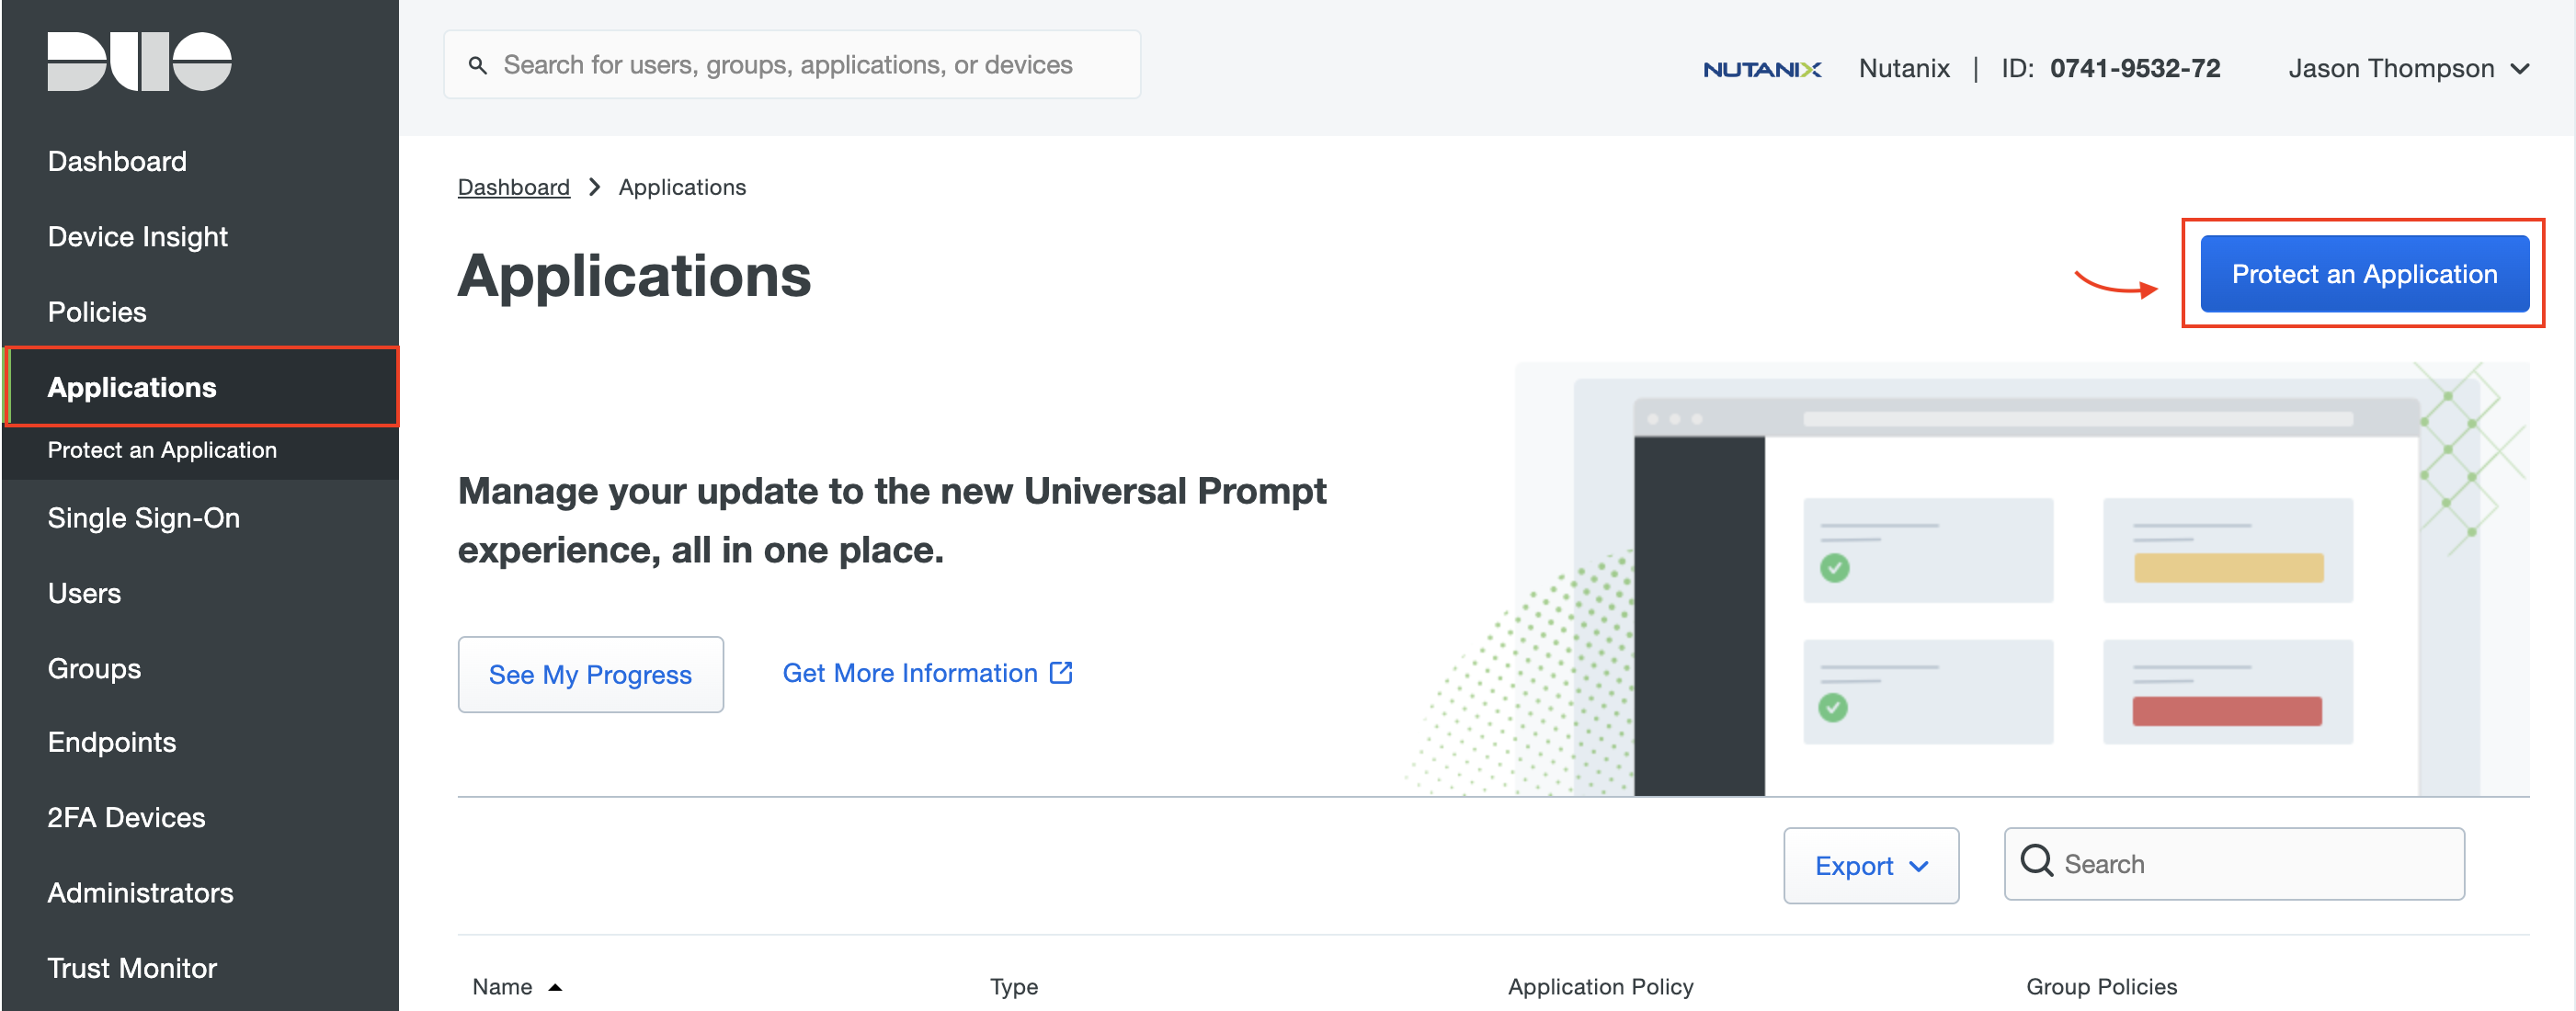
First, we will add a new Application in the Duo Admin Panel. Click Applications on the sidebar, then click Protect an Application.
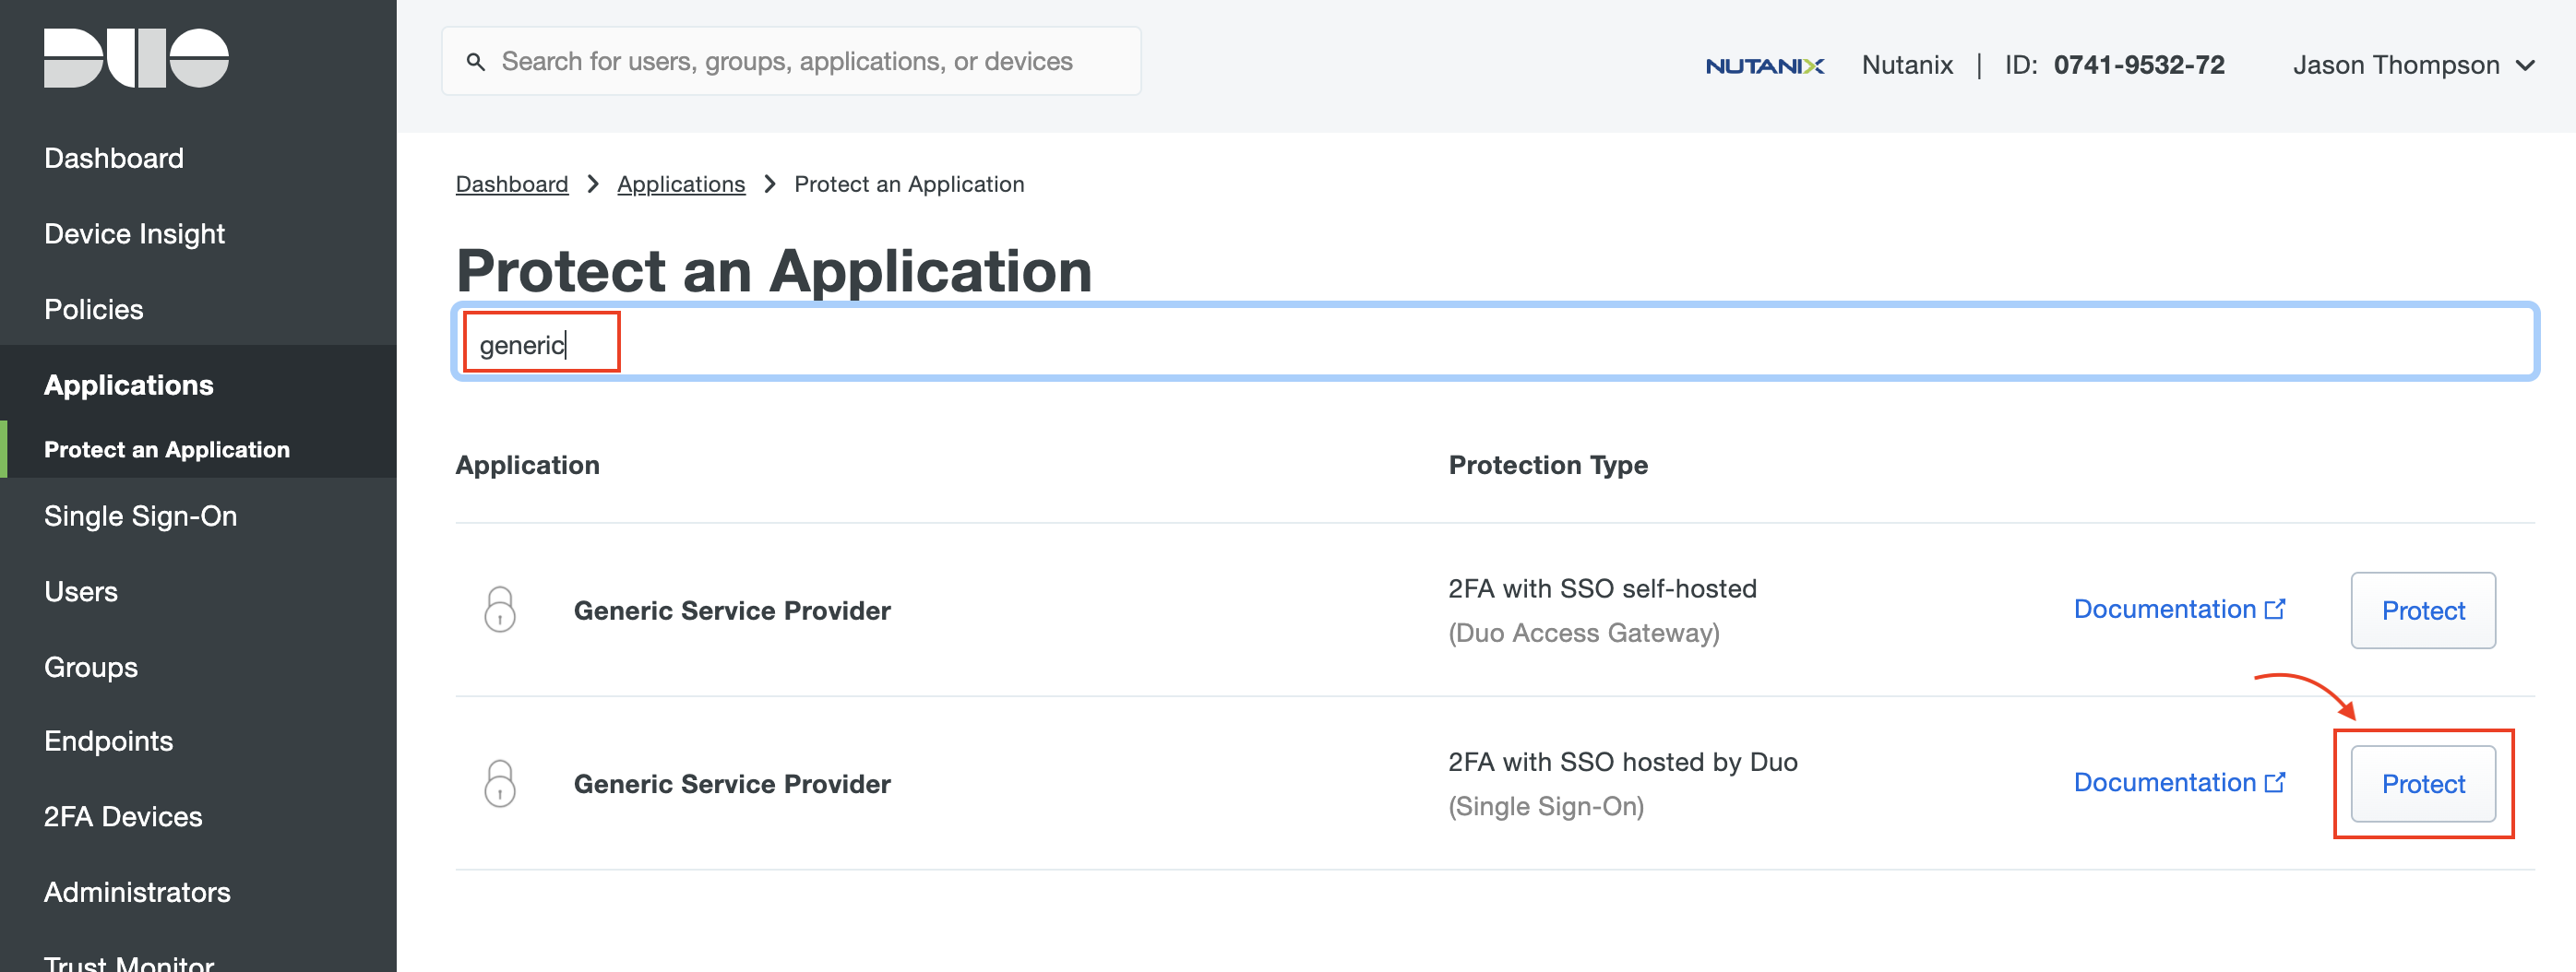
Next, type generic in the search field to filter applications. Look for “Generic Service Provider for Single Sign-On (hosted by Duo),” and click Protect.
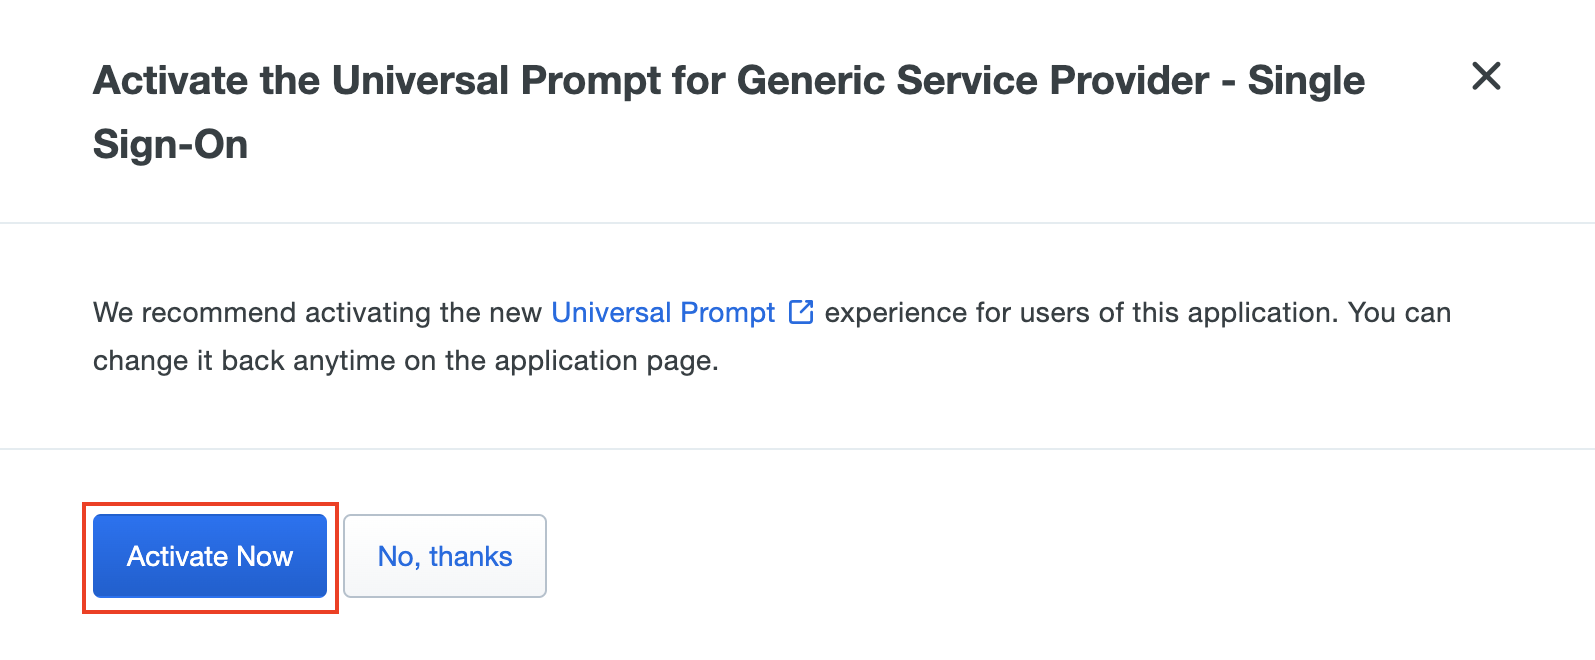
You should see the new Application page. You may see a dialog box requesting you activate Duo's Universal Prompt. This is optional but we recommend it for a better user experience.
When the dialog disappears, you will be taken to your Application's settings page.
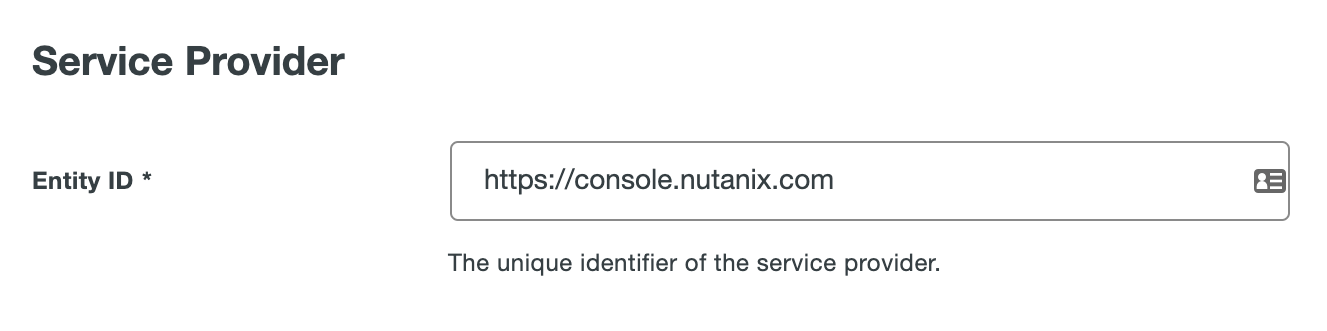
Scroll down on the Application Page until you see the Entity ID form field under Service Provider.
Now it's time to come up with an Entity ID and a URL-friendly Integration Name that we will use in the configuration forms between Duo's Application page and Nutanix Console.
- Entity ID: This is typically a URL for the Service Provider, e.g.
https://console.nutanix.com/. This value will need to match in both Duo and Nutanix Console.
- Entity ID: This is typically a URL for the Service Provider, e.g.
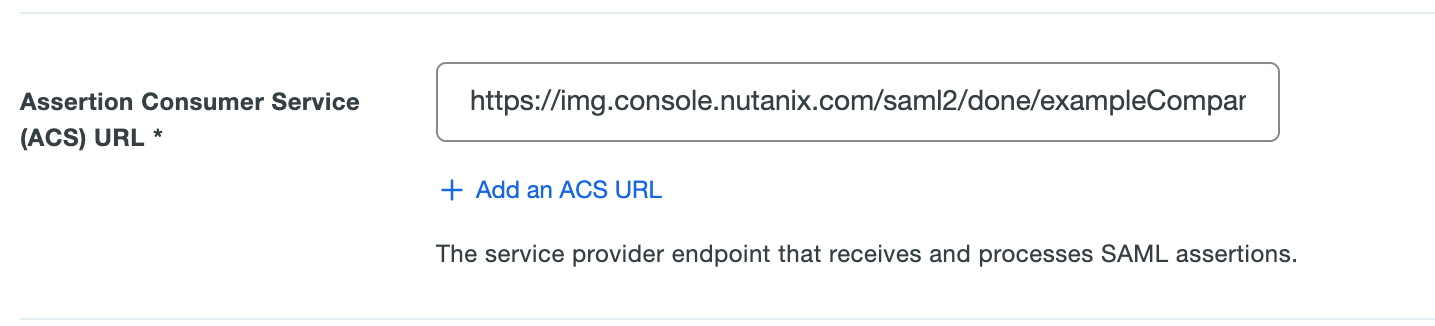
In the Assertion Consumer Service (ACS) URL field, enter the ACS URL as defined in the Getting Started section of this page.
cautionThe forward slash at the end of the URL is required for the integration to work correctly.
Leave the Single Logout URL and Service Provider Login URL blank.
Enter
https://console.nutanix.comin the Default Relay State field.
Under the SAML Response section, change the following:
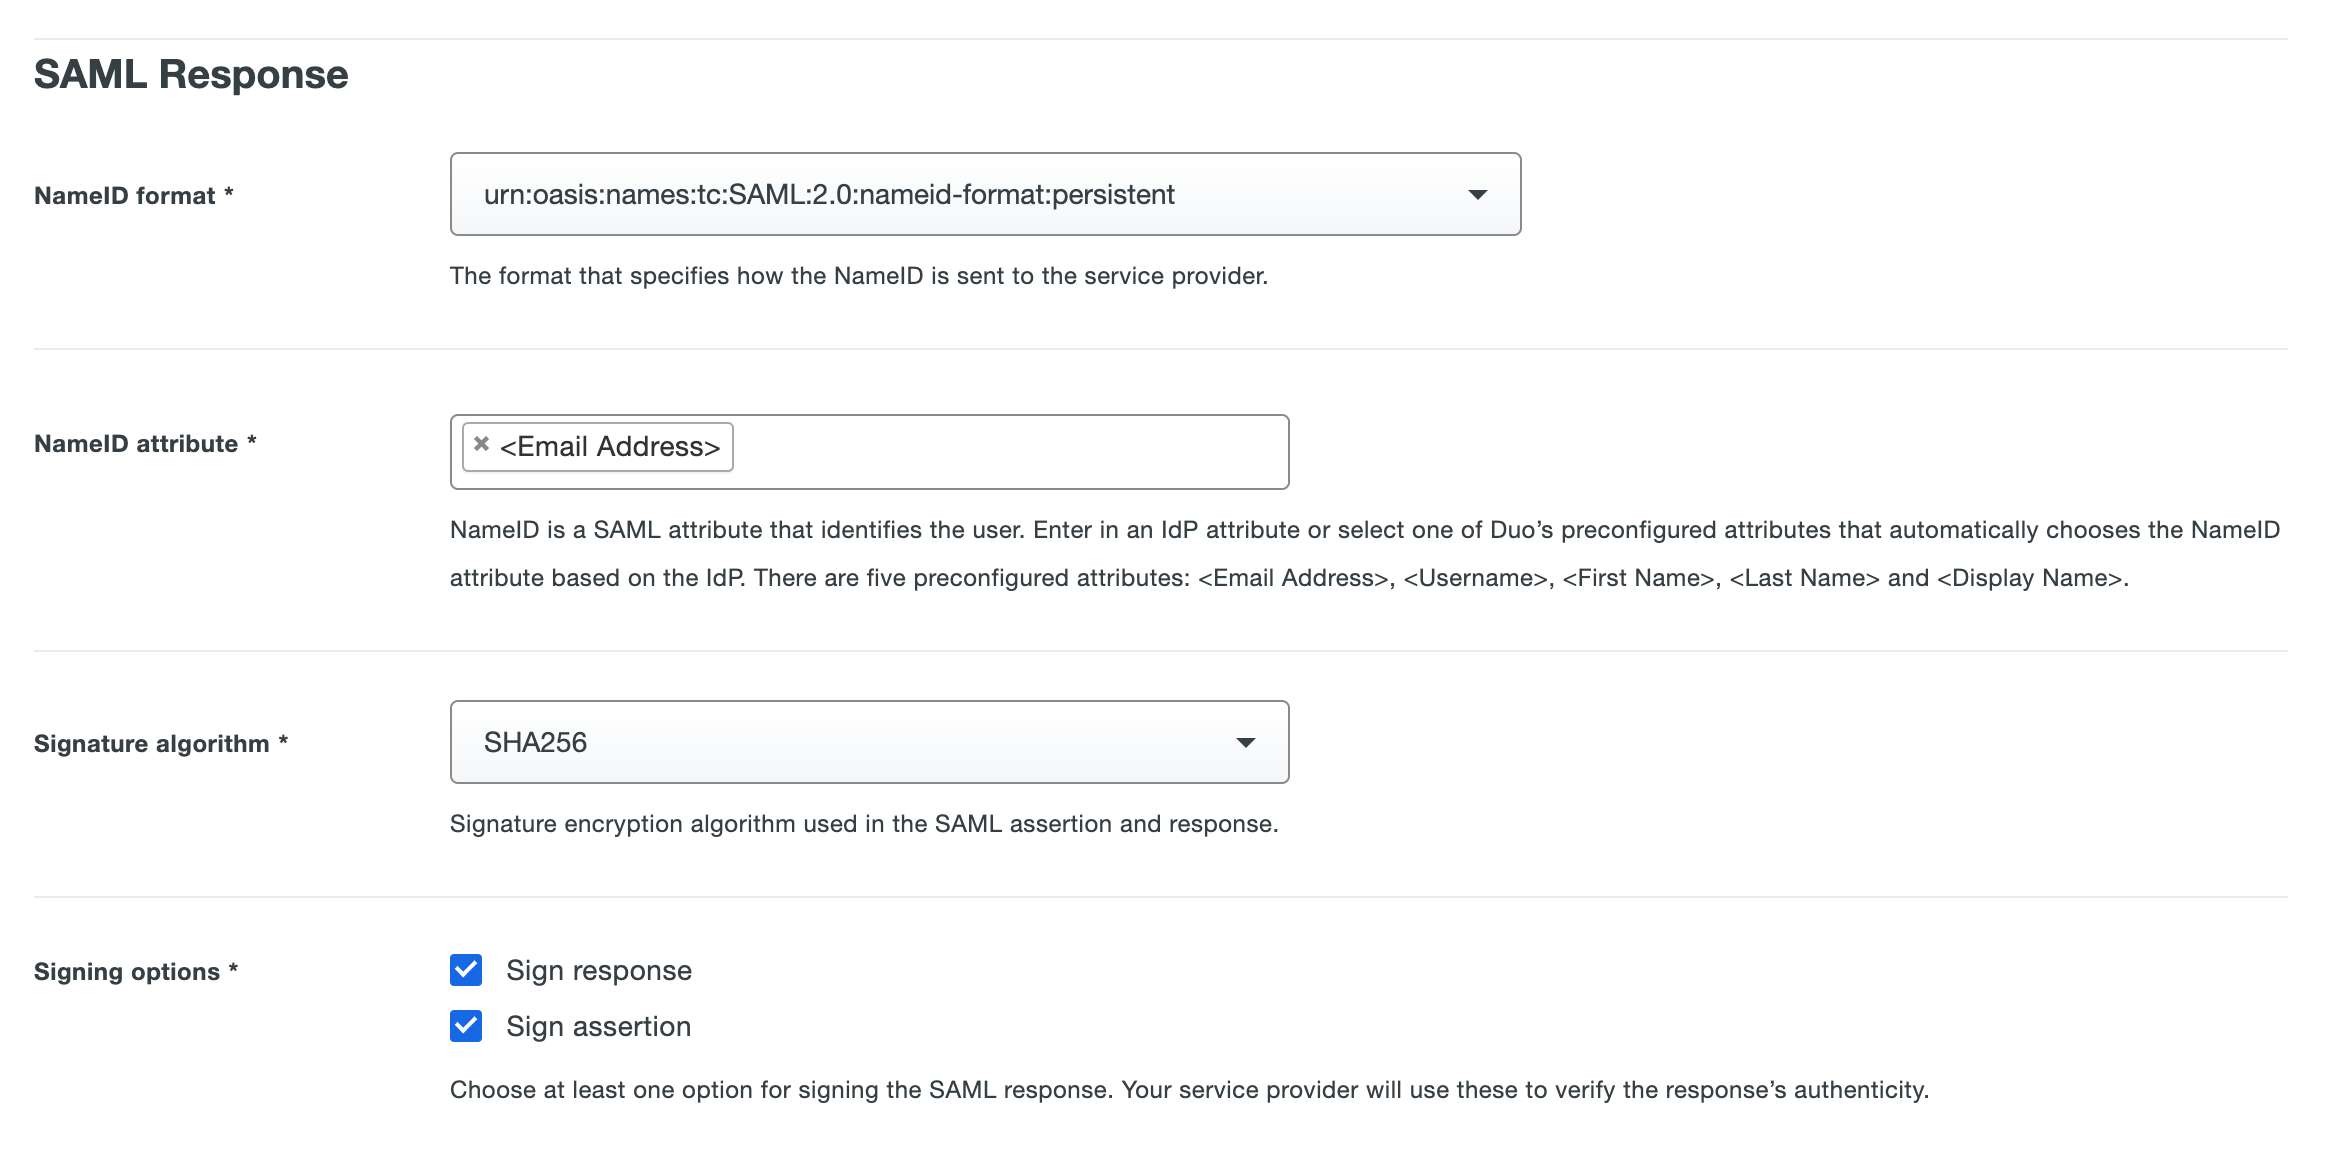
- NameID format to
urn:oasis:names:tc:SAML:2.0:nameid-format:persistent. - NameID attribute you can skip, its default value is exactly what we're looking for (
<Email Address>). - Signature Algorithm should be SHA256.
- Signing Options, both checked.
- NameID format to
Under the Map attributes subsection of SAML Response, we need to specify three custom attributes as follows:
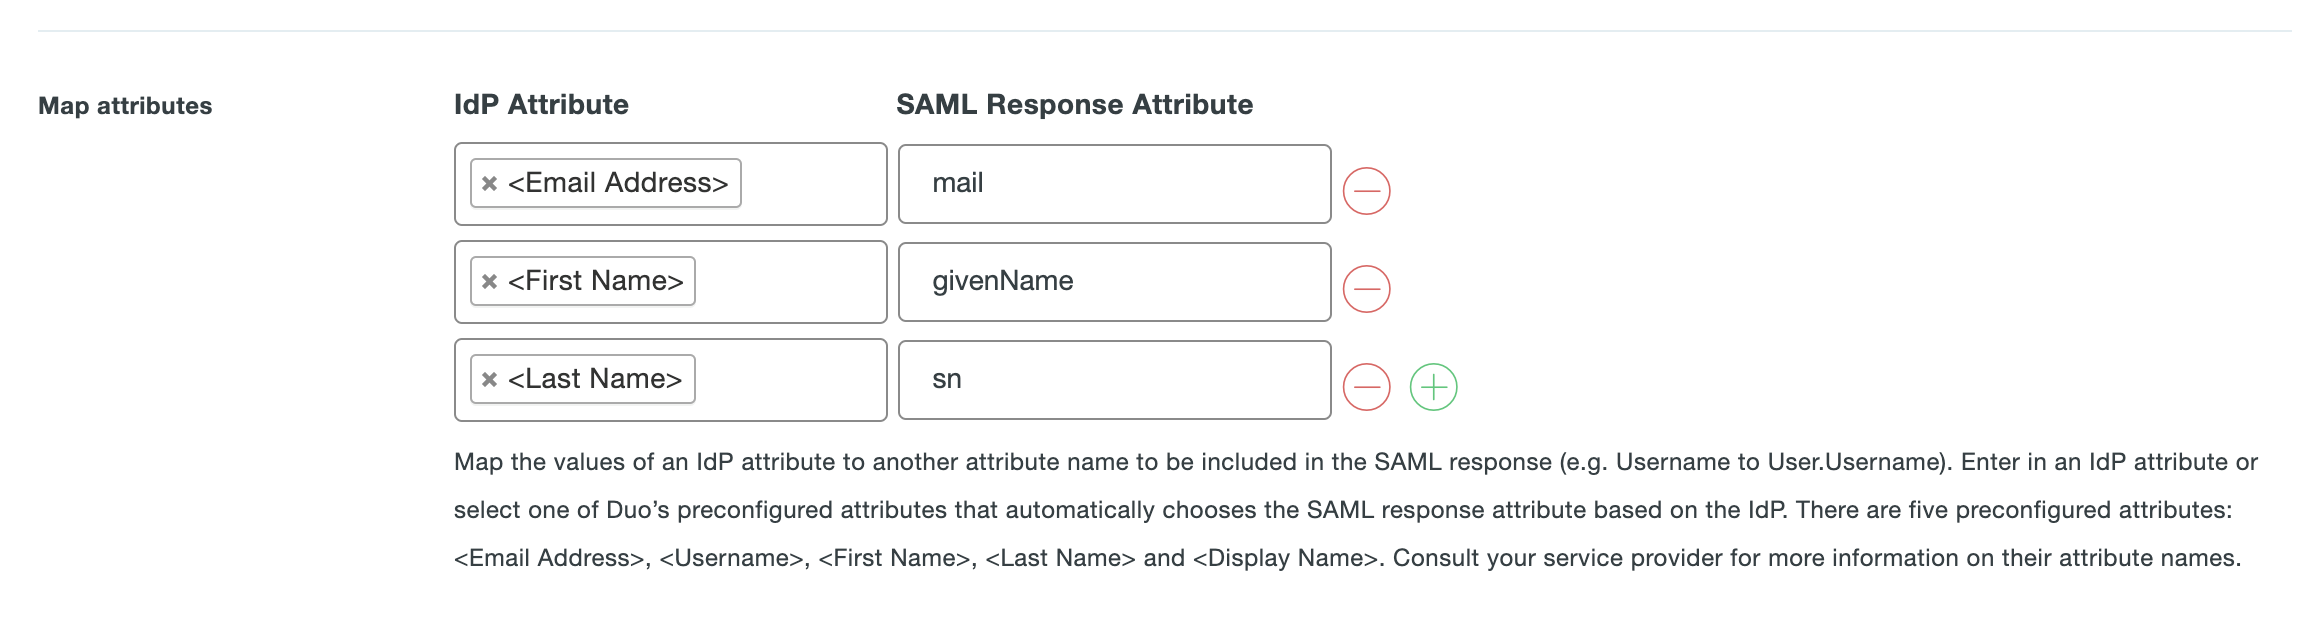
- IdP Attribute
<Email Address>- SAML Response Attribute:mail. - IdP Attribute
<First Name>- SAML Response Attribute:givenName. - IdP Attribute
<Last Name>- SAML Response Attribute:sn.
- IdP Attribute
Scroll down to the Settings section, enter
Nutanix Framein the Name field.Feel free to customize the remaining settings as desired. When you're done, click Save at the bottom.
Configure Duo in Frame Admin Console
Open a new browser tab and navigate to https://console.nutanix.com to log in. We will be switching back to this Duo tab to grab a few values shortly.
Before a SAML2 identity provider can be added, the administrator must enable SAML2 Providers at a given level by opening a new tab and navigating to the Admin Console. From there, navigate to the Customer or Organization page (depending on where you wish to add the IdP). Select Users from the left-hand menu.
Under Authentication, enable the SAML2 toggle and click Save in the upper right corner.
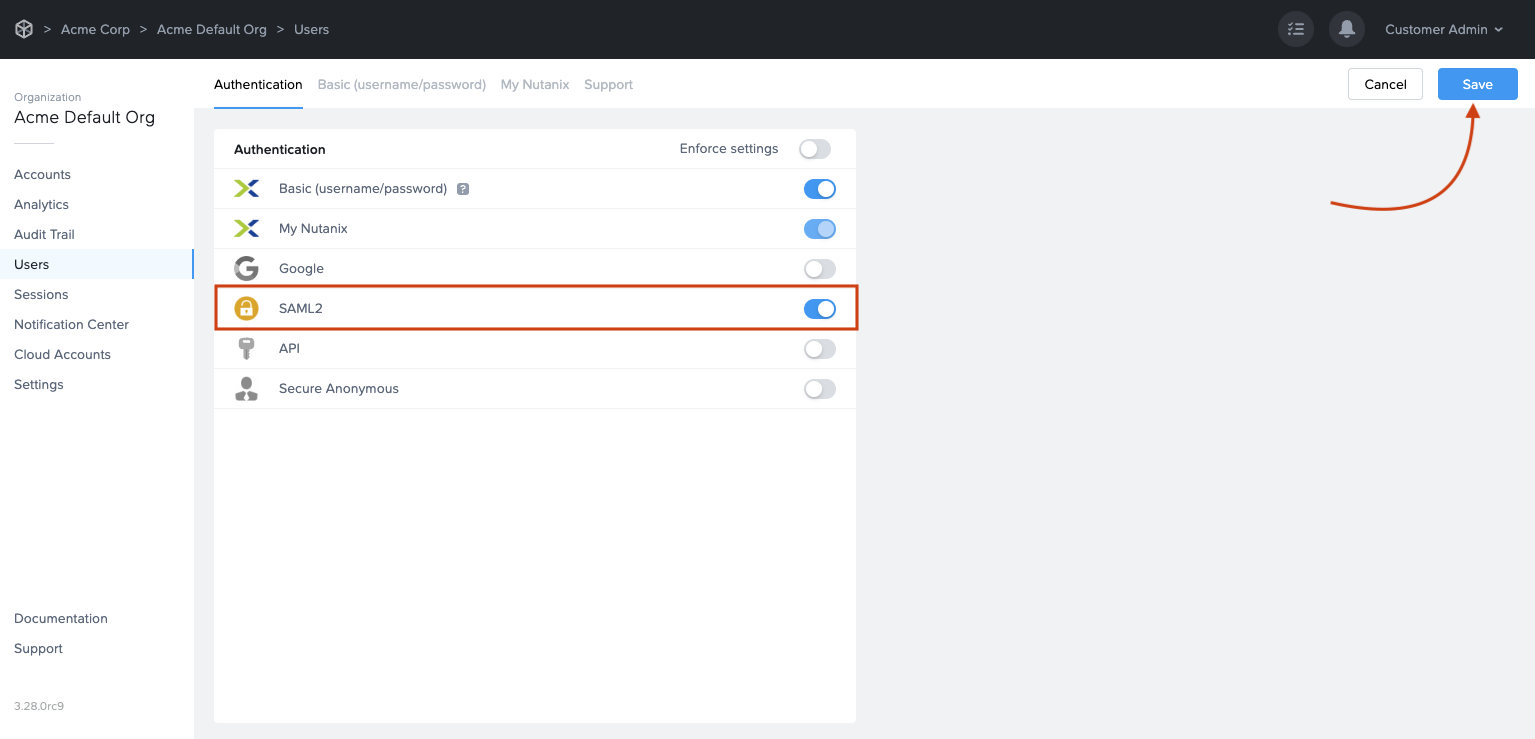
More options will appear next to the Authentication tab, click on the SAML2 Providers tab.
Click Add SAML2 Provider.
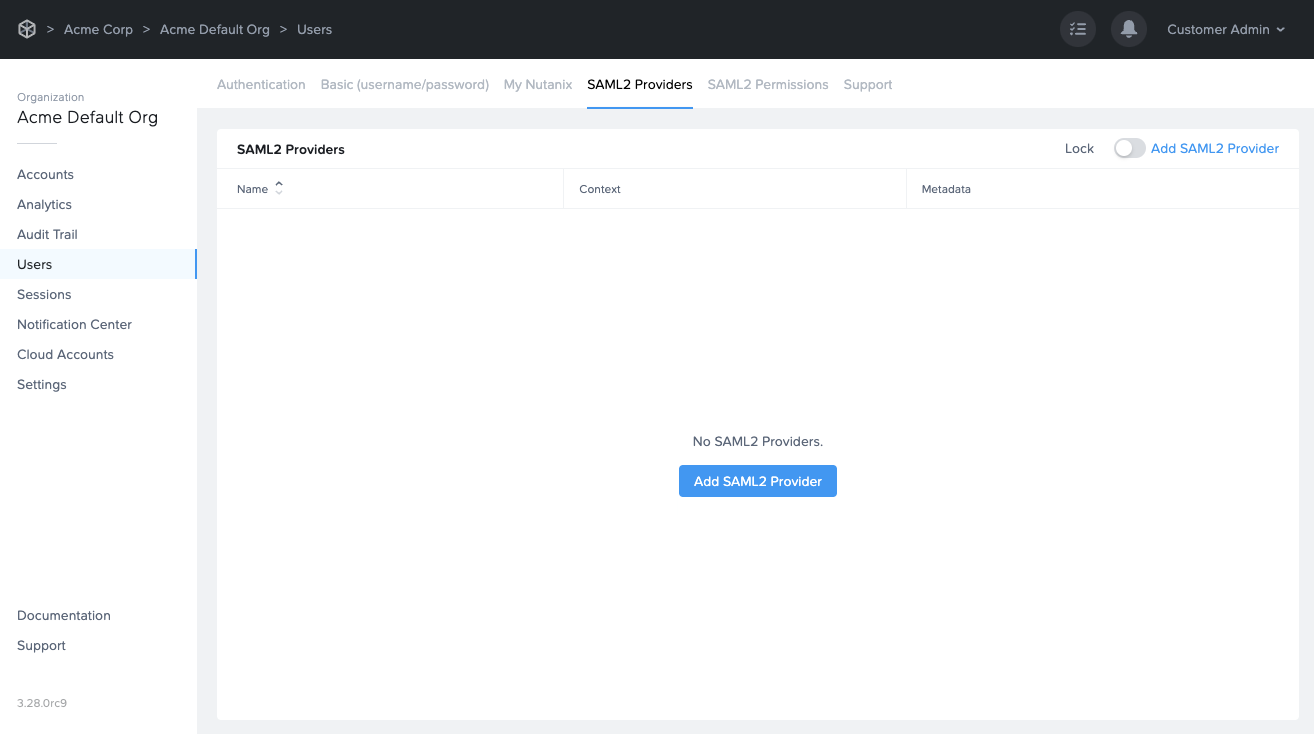
A new dialog box will appear. Enter the following values as shown below:

- Application ID: Paste the Entity ID value from Step 5 of the Duo section.
- Auth provider metadata: paste in the metadata URL from our Duo Application page. Navigate to Duo in another tab and copy the metadata URL and paste it into here. This should look something like this:
https://sso-2e394ff8.sso.duosecurity.com/saml2/sp/EEFCL3C8EXAMPLEKA7DW/metadata. - Integration Name: Enter the SAML2 Integration name defined in the Getting Started section of this page.
- Custom Label: Set the label to "Duo" or your company name.
- Authentication Token Expiration: Set the token expiration slider to a duration that makes sense for your users.
- Signed Response: enabled.
- Signed assertion: enabled.
When you're finished, click Add.
That's it! You have successfully created your Duo integration with Frame! Move on to the next section to learn more about configuring permissions.
Configuring SAML2 Permissions
Once the SAML2 Provider is successfully configured in the Nutanix Console, administrators will need to add authorization rules from the SAML2 Permissions tab listed to the right of the SAML2 Provider tab.

Add roles/permissions for your users by following our Roles and User Permissions with a SAML2 IdP guides.
Once you've configured permissions for your users, that's it! You're ready to test signing into Frame at your Entity URLs (Launchpad, Account Dashboard, etc.)!
Accessing Frame with Duo
Your Duo integration will now appear to your users as a sign in button on your specific Frame Sign in Page.