ADFS
Integrating Microsoft Active Directory Federation Services (ADFS) is straightforward. We start by creating an SAML2 Provider from within Frame. Using information from those steps, we to continue our SAML2 integration from within ADFS. We also cover passing and parsing of other claims/assertions for groups and how you can use that information to dynamically allocate Frame resources to your users.
Getting Started
To begin, let's create a URL-friendly SAML2 Integration Name that we'll use in a few places throughout our setup. Continue below for help and examples that you can use in your SAML integration.
Integration Name examples for Microsoft ADFS
Your SAML2 Integration Name is a case-sensitive, URL-friendly, unique, and descriptive value that represents the integration between your Microsoft ADFS and Frame. This value can have only letters, numbers, and the dash symbol; no spaces or punctuation are allowed.
We recommend using something that includes descriptive information, such as your company and identity provider's names. This integration name is tied to your SAML2 endpoints on Frame and using descriptive names can be useful for debugging.
Optionally, fill out the information below to get a recommendation of what you could use.
Using the values copied from above and following the steps below, we'll create and gather these details to configure proper communication between ADFS and Frame.
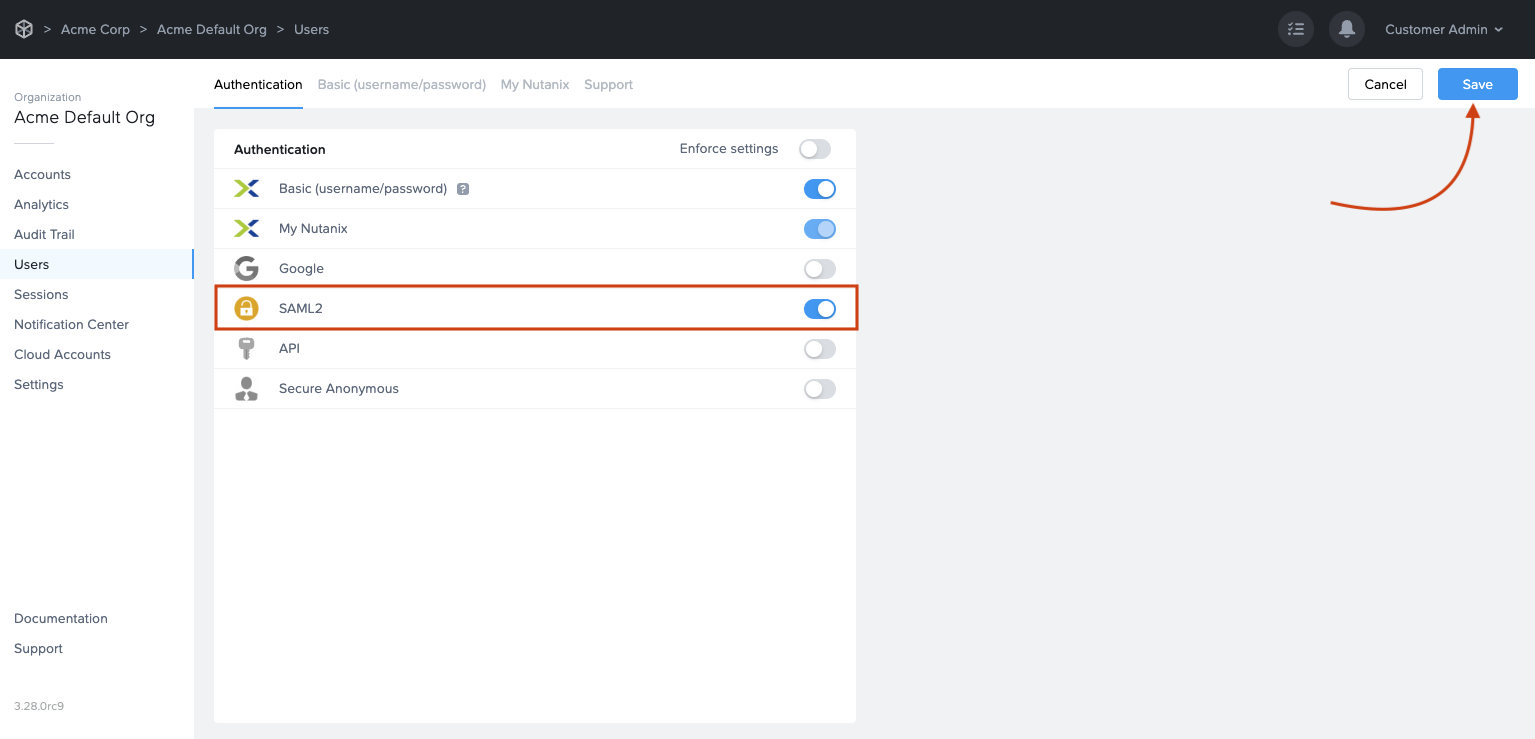
Before a SAML2 identity provider can be added, the administrator must enable SAML2 Providers at a given level by navigating to the Admin Console. From there, navigate to the Customer or Organization page (depending on where you wish to add the IdP). Select Users from the left-hand menu.
From there, navigate to the Authentication tab and enable the SAML2 toggle. Click Save.
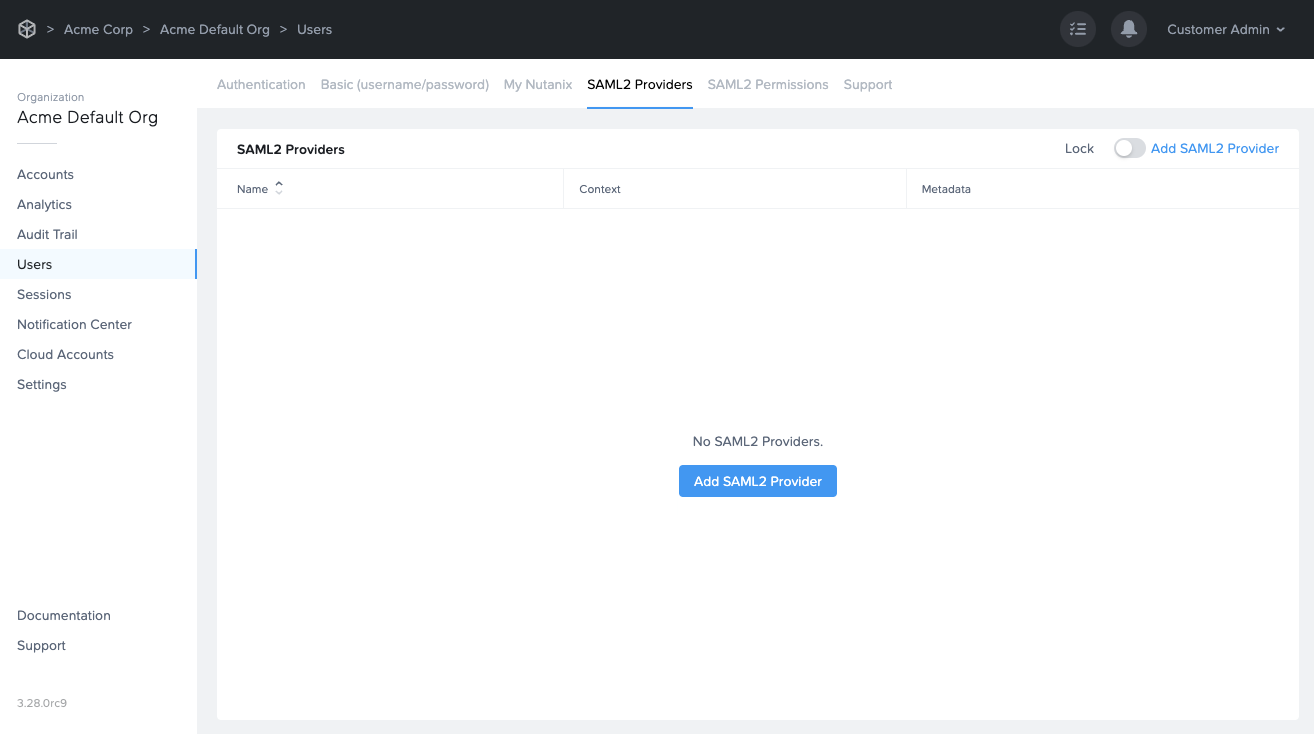
More options will appear next to the Authentication tab, click on the SAML2 Providers tab.
Click Add SAML2 Provider.
The Add a SAML2 identity provider dialog will appear. Enter the information as described below:
Application ID: The Application ID identifies a partner across federation interactions and can be set to any DNS-compliant string such as urn:companyframe:adfs.
Auth provider metadata: Typically, all Microsoft ADFS metadata URLs will be in the following format:
https://[your-ADFS-domain]/FederationMetadata/2007-06/FederationMetadata.xmlnoteIf you would like to verify your metadata URL, navigate back to the ADFS management console and open the “Service” folder. Click “Endpoints.” On the “Endpoints” page, scroll down to the “Metadata” section. Find the URL with the “Federation Metadata” type listed next to it. The ADFS metadata URL must be publicly accessible to Frame Platform on the Internet.
Integration Name: Enter your unique SAML Integration name here. The name is unique across Frame Platform and should have only letters, numbers, and the dash symbol; no spaces or punctuation are allowed. It is also case-sensitive and will be embedded in URLs. We'll use the SAML integration name docs-auth-adfs for the rest of the instructions. Please do not use this name for your own integration.
Custom Label: When specified, this value will be used in the login page as
Sign in with <Custom Label>.Authentication token expiration: Set the desired expiration time for the authentication token. This can range from 5 minutes to 7 days.
Signed response: Leave this toggle disabled. If you wish to use Signed SAML2 Responses, please contact Frame Support or your Account Manager for further instructions.
Signed assertion: Enable this toggle.
After filling out each field carefully, click Add.
Configuring ADFS
Add Relying Party and Trusts to ADFS
Next you must perform some setup tasks in your Microsoft ADFS environment to integrate with your new Custom Authentication setup on Frame. You will need to ensure that your ADFS infrastructure is using a valid SSL certificate that can be verified.
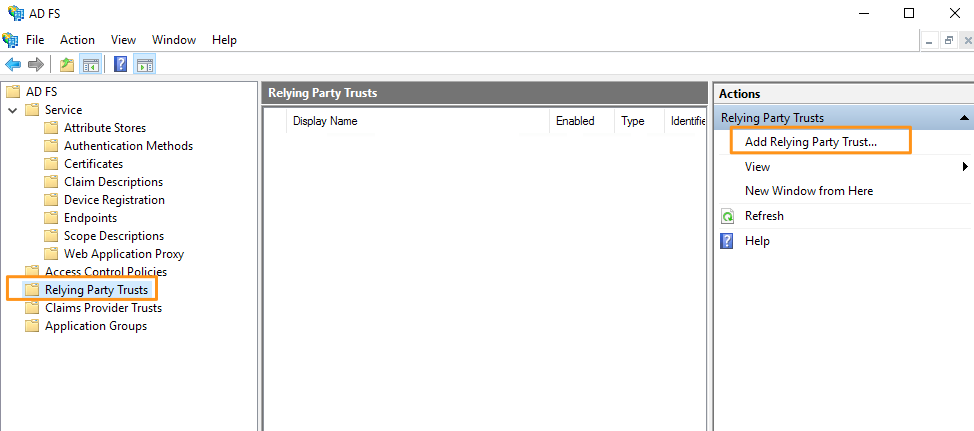
First, navigate to your AD FS Management Console. We will start by adding a new Relying Party Trust.
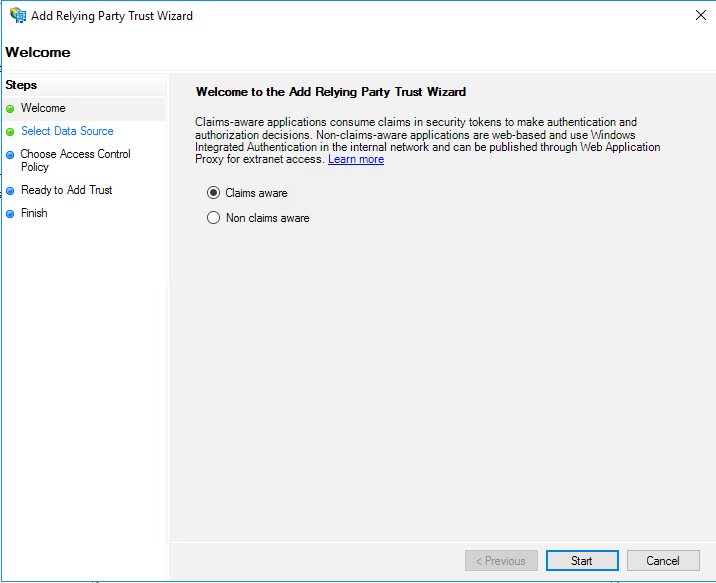
Let's walk through the “Add Relying Party Trust Wizard.” On the “Welcome” screen, select “Claims aware”, then click “Start.”
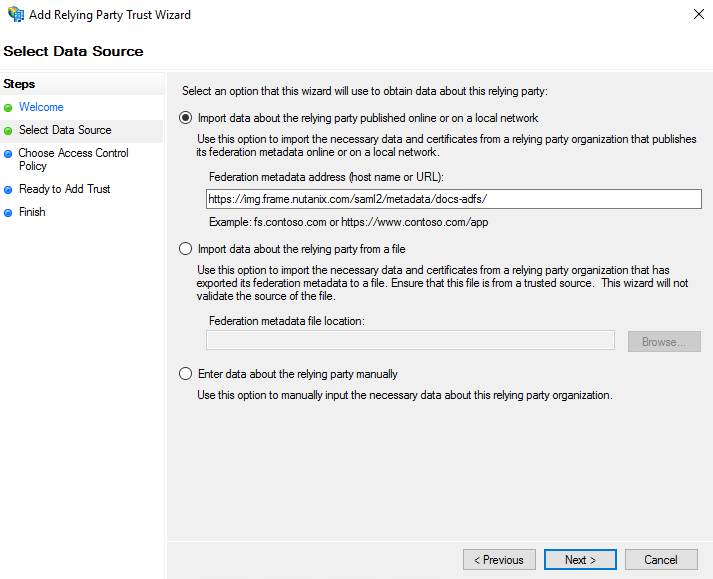
Select “Import data about the relying party published online or on a local network.” Enter the SAML2 Integration Name from the Getting Started section at the beginning of this page.
For example:
 note
noteIf ADFS has no access to the Internet or the specific ADFS deployment does not support TLS 1.2, ADFS will not be able to directly use the Frame metadata URL for its configuration. In this case, you will need to download the XML file from the Frame metadata URL and manually upload the metadata XML file when creating the relying party in ADFS.
cautionAdministrators choosing to cache or store the Frame public key certificates in their SAML2 IdP will need to update those public key certificates when Dizzion renews them.
Ensure there are no errors, and then click “Next.”
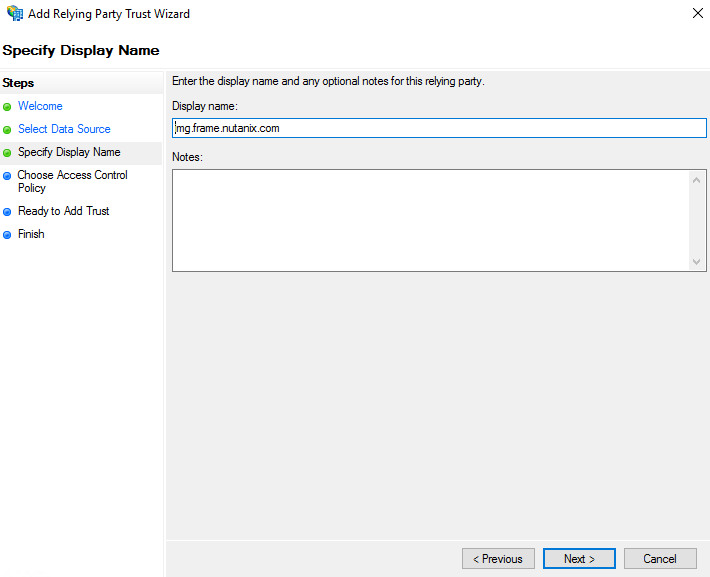
Enter a display name on the next screen and click “Next.”
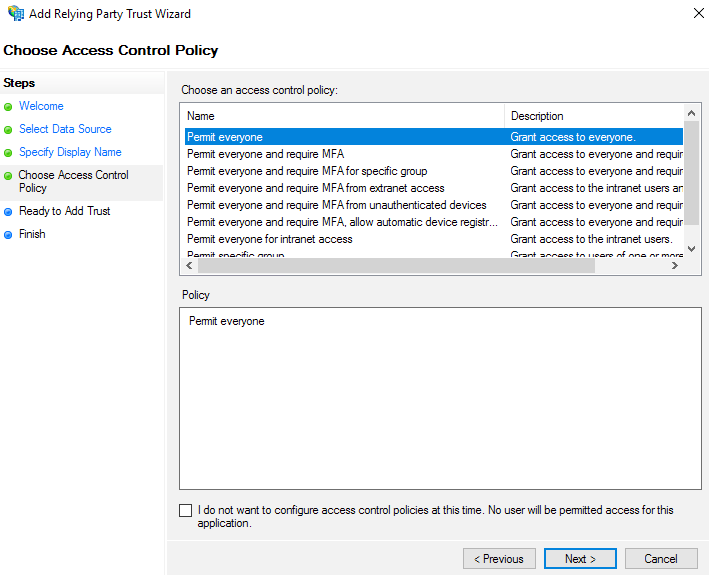
Now choose which Access Control Policy is appropriate for your organization. For example, to ensure that Frame works for all users in your organization, regardless of their location on your network or the Internet, you should choose “Permit everyone.” Click “Next.”
noteFrame recommends starting with “Permit Everyone” and testing authentication with your new SAML2 authentication integration. If your configuration works successfully, you can move on to a more restrictive Access Control Policy.
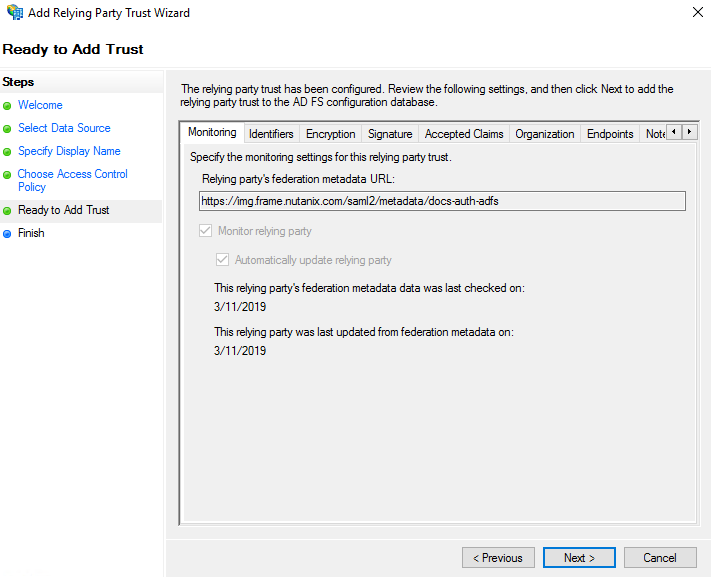
Now review the details in the various tabs of the summary portion of the wizard titled “Ready to Add Trust”. Click “Next”, when ready to finalize your Relying Party Trust configuration.
The “Finish” screen should confirm that you have added the Relying Party Trust successfully. Leave the checkbox checked for “Configure claims issuance policy for this application,” so that we can easily proceed to the next steps.
Edit Claim Issuance Policy
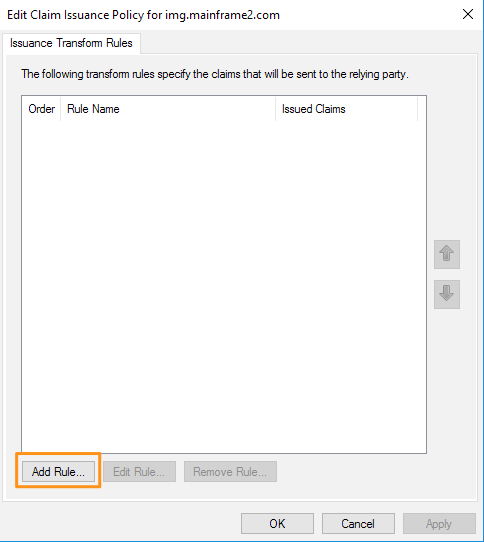
The Edit Claims window will appear. If you don't see it, it may be hidden behind other windows on your screen. Click “Add Rule…” toward the bottom of the window.
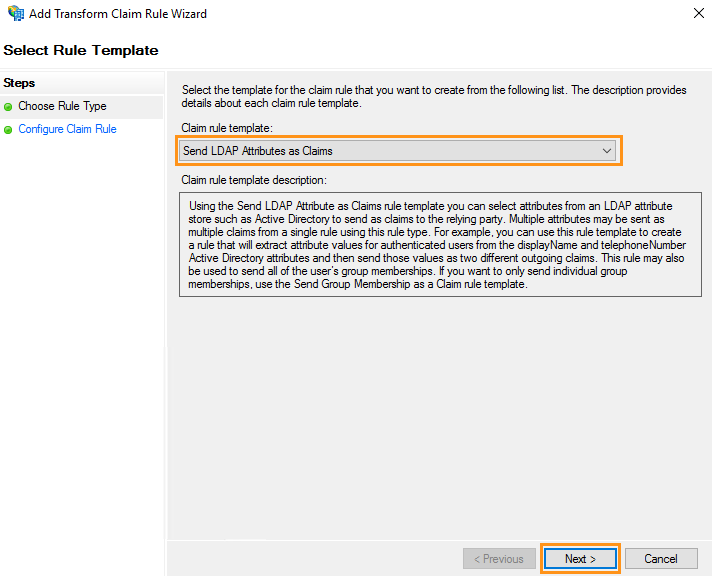
On the “Choose Rule Type” screen, select “Send LDAP Attributes as Claims,” then click “Next.”
Name your “Claim rule name” and then select “Active Directory” from the drop-down menu listed under “Attribute Store.” Add three LDAP attributes to outgoing claim types as shown below. Click “Finish” once completed.
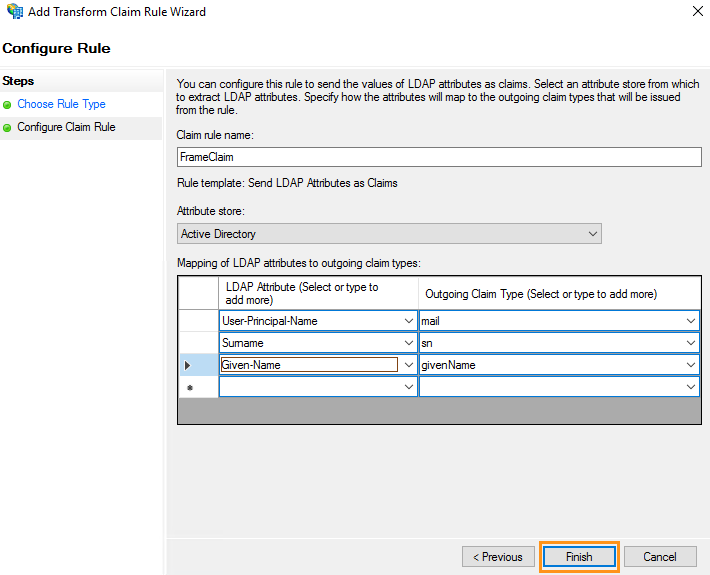
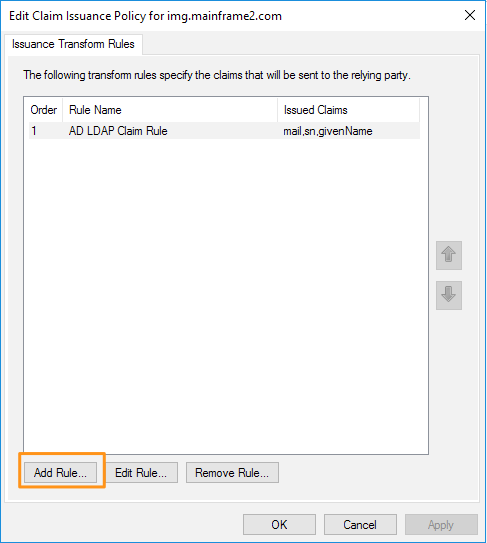
LDAP Attribute Outgoing Claim Type User-Principal-Name mail Surname sn Given-Name givenName You'll see your new Rule added to the Issuance Transform Rules screen. We're going to add one more Rule, so click Add Rule again.
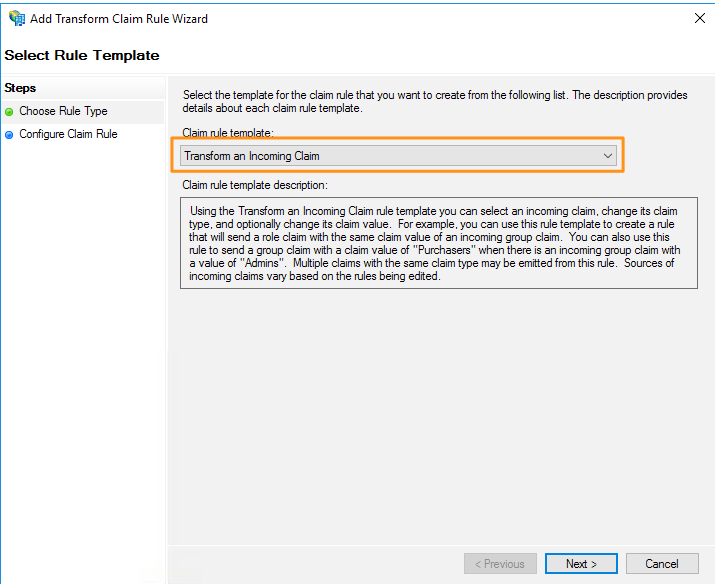
Select Transform an Incoming Claim for this Claim rule template.
On the Configure Claim Rule screen, enter a Claim rule name and enter the following info.
Name Value Incoming claim type mail Outgoing claim type Name ID Outgoing name ID format Persistent Identifier 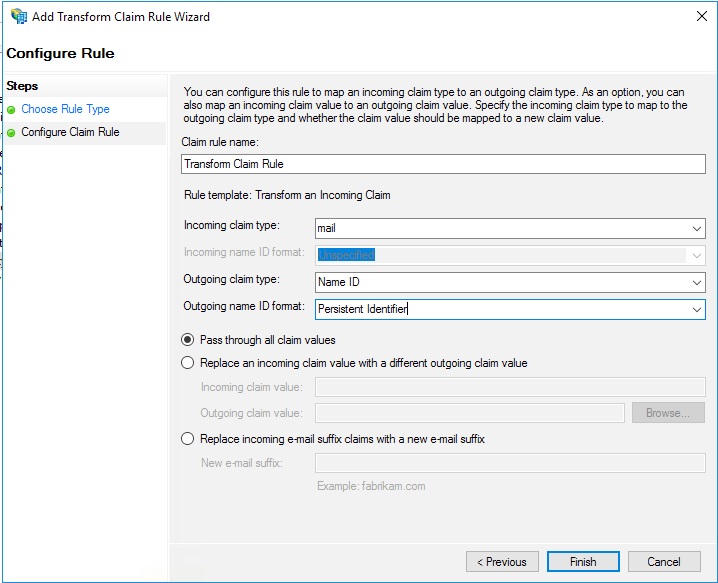
Select Pass through all claim values, then click Finish.
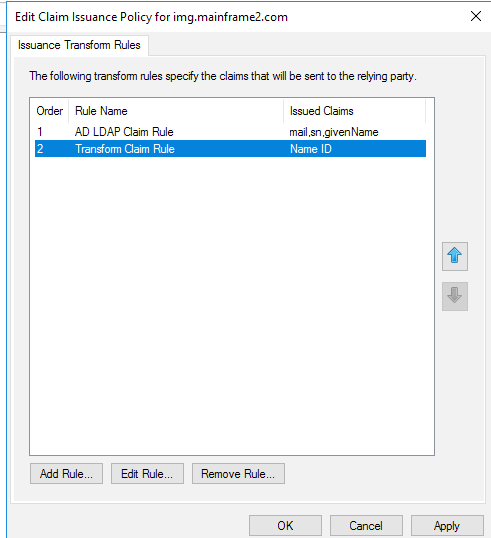
You'll see both of your Rules listed. Optionally, you can choose to send group membership as part of the claim. To do this, continue to the next step, otherwise, click OK to complete your ADFS configuration and continue to the Configure Authorization Rules section.
To send group membership as a claim, click Add Rule again and continue reading.
Configure Group Claims
Select Send Group Membership as a Claim for this Claim rule template

On the Configure Claim Rule screen, enter a Claim rule name and enter the following info.
Name Value User's group Browse to and select the desired Active Directory group Outgoing claim type Group Outgoing claim value Value of your choice to send when a user is a member of the selected group 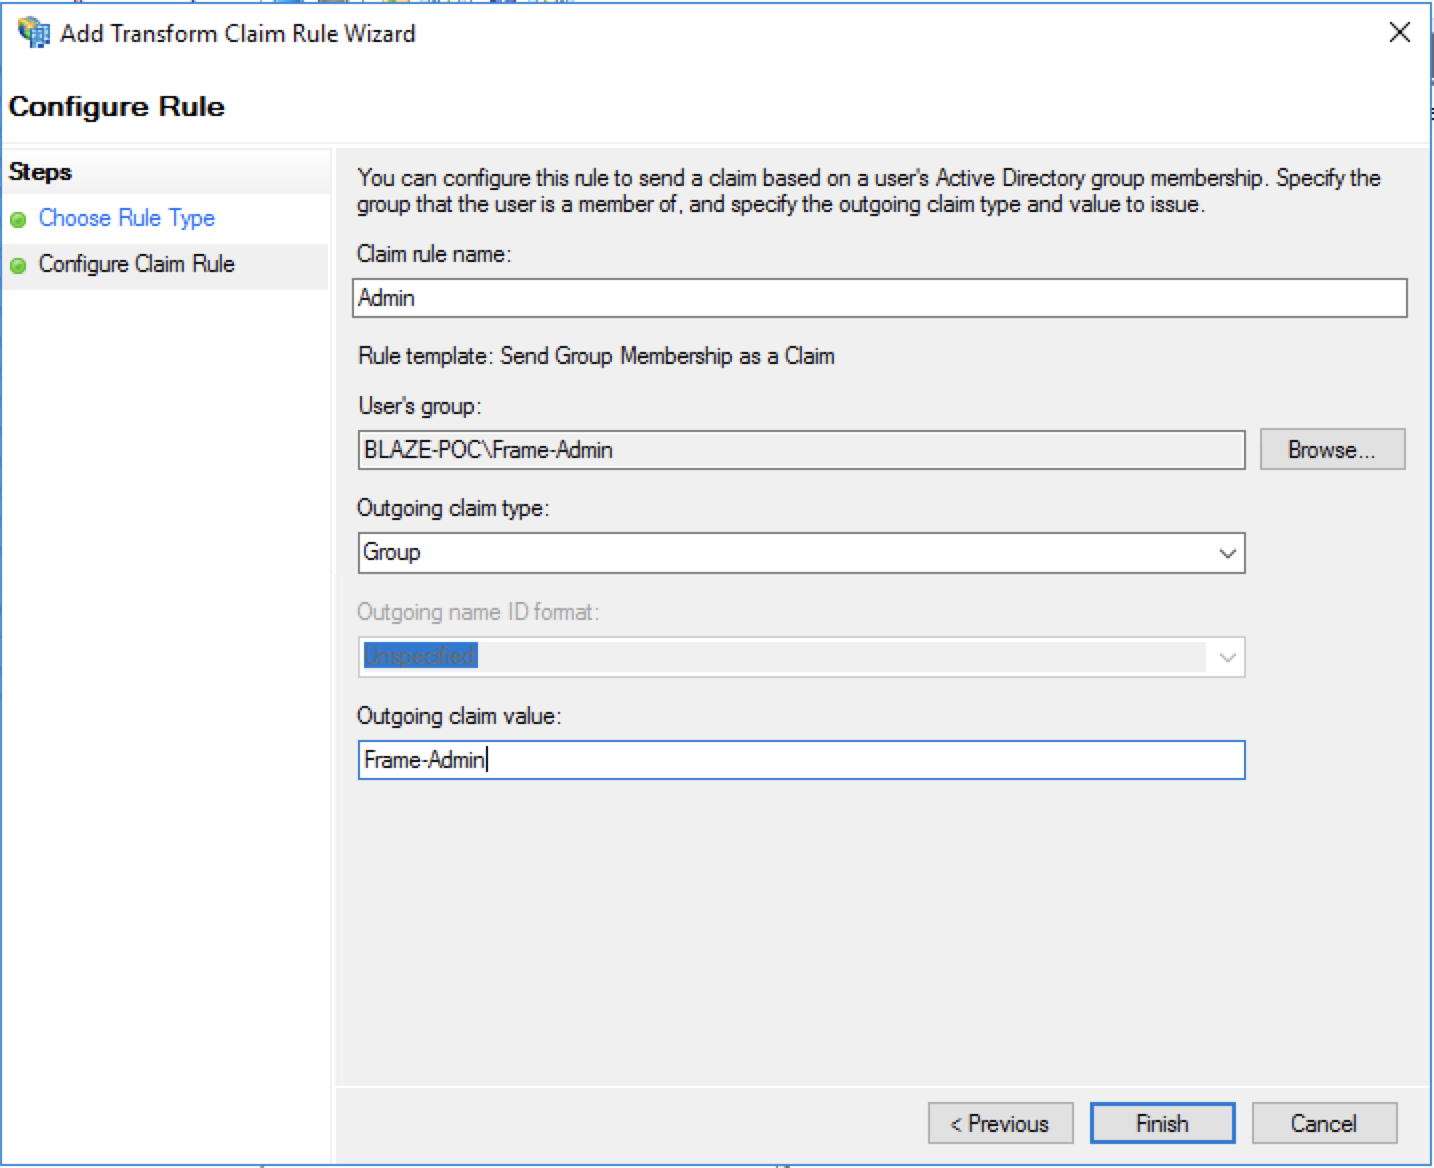
Click Finish when done.
Configuring SAML2 Permissions
Once the SAML2 Provider is successfully configured in the Nutanix Console, administrators will need to add authorization rules from the SAML2 Permissions tab listed to the right of the SAML2 Provider tab.

Add roles/permissions for your users by following our Roles and User Permissions with a SAML2 IdP guides.
Once you've configured permissions for your users, that's it! You're ready to test signing into Frame at your Entity URLs (Launchpad, Account Dashboard, etc.)!
The Group claim, created in the prior section, must be referenced as http://schemas.xmlsoap.org/claims/Group when creating the SAML2 Permission authorization rule.
Accessing Frame with ADFS
Your ADFS integration will now appear to your users as a sign in button on your specific Frame Sign in Page.